Friday, January 30, 2009

high quality h264 output

For the last few years, I've been working with 720P content. With the recent purchase of a Canon 5D, I'm now working with 1080P video. Both formats are in 16:9 aspect ratio. 

- 720P video implies a horizontal resolution of 1280 pixels, 1280x720 frame resolution with a total of 921,600 pixels. 

- 1080P video implies a horizontal resolution of 1920 pixels, 1920x1080 frame resolution with a total of 2,073,600 pixels. 

Though this is a blog on Linux video editing, I heartily welcome good information on the often confusing subject of video compression. Here is an article on Apple's site that conveys the basic information you'll need to understand about encoding H264 videos: http://www.apple.com/quicktime/tutorials/h264.html 

As I work to produce higher quality video, one of the things I've thought about is the possibility of getting my material aired on cable TV. So the Broadcast Standards discussion in the above Wikipedia article was very interesting. Also, it occurred to me that I've never properly understood the differences between fields and frames, in the context of telecine, or how film is transferred to video. The Wiki article above clarified it for me and is highly recommended. 

Fields and frames are also useful in the context of how Cinelerra processes video.  

Rendering High Quality H264 video 

It is important to understand aspect ratio in the context of rendering high quality video. Lately, I've been encoding H264 video; specifically, I've been reducing the size of my videos to load onto an iPhone/iTouch. For this task, one of the easiest ways to assure best output quality is to make sure that both the height and width of the rendered output are divisible by 16. 

Without going into the highly technical details of the H.264/MPEG-4 AVC standard or how video compression works, here is a somewhat simplistic analysis: "..it's slightly better to have dimensions divisible by 16, but only because H.264 divides up a picture into 16x16 blocks and if you have a partial block it still has to expend time and bandwidth on it. A size that is an exact multiple of 16 H & V will compress a tiny bit more efficiently, or look slightly better at the same bitrate." -extracted from this conversation that no longer exists.

To make sure the dimensions of my videos are always divisible by 16, you can do the calculations yourself, or take a look at a couple nice charts from Andrew Armstrong's site to help you choose dimensions where the height and width are both divisible by 16. 

To make it easy for you, there are only a few choices: 1536x864 1280x720 768x432 512x288 256x144 This will avoid the dread "width or height not divisible by 16, compression will suffer" error you would see in many H264 encoders.  

Robert Swain's blog (again, no longer exists) was very helpful in determining x264 parameters that yield great looking video. Especially the page regarding ffmpeg presets, though I haven't yet determined what preset is best for my content. The presets listed on Robert's page need to be put into a .ffmpeg directory under your user's home directory. 

Finally, this bitrate calculator for was something useful I stumbled up while researching this post.

-- the Mule --

 
PS 2023/04/16 - Sven from videoproc.com was kind enough to point out that Kino has been discontinued and not actively maintained since 2009, and its official website - Kinodv.org, was also completely shut down and out of service since April, 2021.

Sven recently published a guide talking about what happened to Kino and its official website, and you can check it here,
https://www.videoproc.com/resource/what-happened-to-kinodv.htm
 
Thanks again, Sven!

PS 2021/05/31 - Sven from videoproc.org wrote a fantastic piece on H.264 and H.265/HEVC encoding, I learned a lot from it.  Here's the link:

Sunday, January 25, 2009

stock footage, encoding H264 and the iPod

I had a bit of a rough day yesterday. I started early, about 8am, upgrading my MacBook Pro to Leopard. That process went more or less smoothly and finished around noon. Next, I had taken some video the night before and wanted to create a video that would serve as a table of contents to my archive. Also, this short video might enable me to market some of my source material as stock footage. So it might be a fun little project that shouldn't take long. I should know to never say "shouldn't take too long", because things have a way of blowing up in your face when you don't expect them to.

Converting 1080P directly to an iPod-ready format
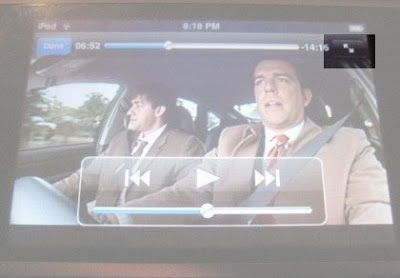
The goal was to convert some 1080P video from my Canon 5D directly into an iPod readable format. However, as I was overly tired on this day, my mind defeated me. Essentially what happened was that after I rendered out the video and loaded it to the iPod, I kept seeing only three quarters of the video. Flummoxed, I thought it must be a rendering problem. Long story short, I found that the problem was not with my rendering parameters, but the fact that my iTouch has a zoom/scaling feature that I forgot about, but had enabled. Here is the little bugger:


So I had spent about three hours until 2am fighting with encoding parameters, re-encoding video, transferring many test files to my Mac and then loading them to the iPod, only to find that the source of the problem was this little stupid icon on the iTouch.

Boy, am I dense.

A Learning Experience
I did learn a few things through my travails this weekend:
1) The el cheapo haze filter on my camera shows a lot of lens flare and needs to be replaced.

2) Don't merge a longer audio stream with a shorter video stream or else you'll be wondering why your 1m45s video is suddenly 9m30s. Duh.

3) When encoding videos to H264 format, always try to use resolutions where the height and width are divisible by 16. This will make the level of compression and quality of the resulting video better. I will post separately about resolutions that are divisible by 16.

4) A dvd video encoded by ffmpeg using -target ntsc-dvd and then downrezzed using the following command syntax will NOT have the proper aspect ratio once loaded onto the iPod:
ffmpeg -y -i ${NAME}.mpg -an -v 1 -threads 8 -vcodec h264 -b 250k -bt 175k -refs 1 -loop 1 -deblockalpha 0 -deblockbeta 0 -parti4x4 1 -partp8x8 1 -me full -subq 1 -me_range 21 -chroma 1 -slice 2 -bf 0 -level 30 -g 300 -keyint_min 30 -sc_threshold 40 -rc_eq 'blurCplx^(1-qComp)' -qcomp 0.7 -qmax 51 -qdiff 4 -i_qfactor 0.71428572 -maxrate 450k -bufsize 2M -cmp 1 -s 720x480 -f mp4 -pass 1 /dev/null

ffmpeg -y -i ${NAME}.mpg -v 1 -threads 8 -vcodec h264 -b 250k -bt 175k -refs 1 -loop 1 -deblockalpha 0 -deblockbeta 0 -parti4x4 1 -partp8x8 1 -me full -subq 6 -me_range 21 -chroma 1 -slice 2 -bf 0 -level 30 -g 300 -keyint_min 30 -sc_threshold 40 -rc_eq 'blurCplx^(1-qComp)' -qcomp 0.7 -qmax 51 -qdiff 4 -i_qfactor 0.71428572 -maxrate 450k -bufsize 2M -cmp 1 -s 720x480 -acodec aac -ab 160k -ar 48000 -ac 2 -f mp4 -pass 2 -threads 8 ${NAME}.mp4


So don't try that at home, kids.

I had previously been using this string of encoding parameters to encode a video of my band rehearsals. The encode was from a DVD source file, so perhaps I will just use the 1080P as source going forward. I will have to test this out first. Strangely, the conversion of the audio from AC3 format had audible hiccups from time to time. Since this process was working fine on Fedora 7, perhaps this is just an issue with Fedora 10.

Downrezzed 1080P Video Ready for the iPod
The following two pass Cinelerra encoding parameters via yuv4mpeg stream worked well to produce a high quality video from 1080P source. In short, you will do two renders from a YUV4MPEG stream:
render 1: the pipe to /dev/null in order to create the optimization log
render 2: the pipe to create the file

#CINELERRA YUV4MPEG RENDER 1
ffmpeg -f yuv4mpegpipe -y -i - -an -v 1 -threads 8 -vcodec libx264 -b 1000k -bt 775k -refs 1 -loop 1 -deblockalpha 0 -deblockbeta 0 -parti4x4 1 -partp8x8 1 -me full -subq 1 -me_range 21 -chroma 1 -slice 2 -bf 0 -level 30 -g 300 -keyint_min 30 -sc_threshold 40 -rc_eq 'blurCplx^(1-qComp)' -qcomp 0.7 -qmax 51 -qdiff 4 -i_qfactor 0.71428572 -maxrate 1000k -bufsize 2M -cmp 1 -s 512x288 -f mp4 -pass 1 /dev/null

#CINELERRA YUV4MPEG RENDER 2

ffmpeg -f yuv4mpegpipe -y -i - -i /mnt/videos/projects/2009_01_23/nightUrbanIndustrialIpod.mp3 -v 1 -threads 8 -vcodec libx264 -b 1000k -bt 775k -refs 1 -loop 1 -deblockalpha 0 -deblockbeta 0 -parti4x4 1 -partp8x8 1 -me full -subq 6 -me_range 21 -chroma 1 -slice 2 -bf 0 -level 30 -g 300 -keyint_min 30 -sc_threshold 40 -rc_eq 'blurCplx^(1-qComp)' -qcomp 0.7 -qmax 51 -qdiff 4 -i_qfactor 0.71428572 -maxrate 1000k -bufsize 2M -cmp 1 -s 512x288 -acodec libfaac -ab 160k -ar 48000 -ac 2 -f mp4 -pass 2 -threads 8 %

I chose a resolution of 512x288 because:
1) the aspect ratio is the same as my 1080P source video, 16:9 (1.777)
2) both the height and width are divisible by 16
3) there were no errors and it comes out looking great on the iPod

Rendering Parameters for a High Quality Vimeo Upload
Finally, I was able to output an H264 video at 1920x1080 that looks great in Vimeo. Psych! I was able to remove the ugly bottom bar seen in Vimeo from my previous post. Here is the two-pass encoding method that I used from Cinelerra. Two notes:
1) the two passes are YUV4MPEG stream renders from Cinelerra using FFMPEG and will need to be run as individual renders in Cinelerra.
2) the second pass muxes (combines) a pre-rendered audio stream with the video stream. So you'll need to render that audio file first.

Here is your first render command string (the first pass of the two-pass) that will create the optimization log:
#CINELERRA RENDER PASS1
ffmpeg -f yuv4mpegpipe -y -i - -an -v 1 -threads 8 -vcodec libx264 -aspect 1.7777 -b 9000k -bt 7775k -refs 1 -loop 1 -deblockalpha 0 -deblockbeta 0 -parti4x4 1 -partp8x8 1 -me full -subq 1 -me_range 21 -chroma 1 -slice 2 -bf 0 -level 30 -g 300 -keyint_min 30 -sc_threshold 40 -rc_eq 'blurCplx^(1-qComp)' -qcomp 0.7 -qmax 51 -qdiff 4 -i_qfactor 0.71428572 -maxrate 10000k -bufsize 2M -cmp 1 -f mp4 -pass 1 /dev/null


Here is the second render command that takes advantage of the optimization log created in the first-pass render. I rendered an audio file of my project earlier, so this second command also combines that audio file with the video for my final result:
#CINELERRA RENDER PASS2
ffmpeg -f yuv4mpegpipe -y -i - -i /mnt/videos/projects/blog/waterSmall.mp3 -v 1 -threads 8 -vcodec libx264 -aspect 1.7777 -b 9000k -bt 7775k -refs 1 -loop 1 -deblockalpha 0 -deblockbeta 0 -parti4x4 1 -partp8x8 1 -me full -subq 1 -me_range 21 -chroma 1 -slice 2 -bf 0 -level 30 -g 300 -keyint_min 30 -sc_threshold 40 -rc_eq 'blurCplx^(1-qComp)' -qcomp 0.7 -qmax 51 -qdiff 4 -i_qfactor 0.71428572 -maxrate 10000k -bufsize 2M -acodec libfaac -ab 160k -ar 48000 -ac 2 -cmp 1 -f mp4 -pass 2 %


I think the quality is bloody AWESOME! Take a gander:

2009/01/23: night, urban, industrial from crazed mule on Vimeo.

Conclusion
Through pain, there can sometimes be the brighter side. In this case, I learned a few things. In retrospect, I may have chosen my production company's name correctly. A mule is one stubborn beast.

Related to crazed mules, here is a story I stumbled upon the other day you might find funny:
The Day the Mules Went Crazy

The Mule

Reference
H264 Encoding
FFMPEG HowTo

Monday, January 12, 2009

Water, a new Canon 5D video

After a couple of weeks of gathering content, I completed my first real Cinelerra project using the 1080P output from my brand new Canon EOS 5D Mark II.

This camera outputs some gorgeous video as I showed in my last post. Now I have to learn how to shoot with it!

The Project
My goal with this short production was:
1) to show the capabilities of the camera
2) to prove that Cinelerra was up to the task of editing 1080P content
3) to output the final results to different output formats (media player, Vimeo, back into Cinelerra)

I'm a hobbyist, so I don't have a budget and "script" like Vincent Laforet. However, I like to compile scenes and organize them with musical accompaniment in thoughtful ways that are (hopefully) enjoyable to the viewer.

The Images
Since I am not a professional photographer, I did not have a slew of lenses before I bought the cam. I only used two lenses that I recently bought for this video:
Canon EF 24-105mm f/4 L IS USM Lens
Canon EF 50mm f1.4 USM Lens

In regards to the imagery, about half of the shots were taken with a tripod. Where you see shakey video is obviously where I held the cam by hand. You definetly do NOT want to shoot high definition video by hand. It serves to amplify any wobbling present and looks terrible when presented on a high definition television. One thing that saved me was the stabilization provided by the Canon L series zoom lens. It is very effective in dampening bounces, though the stabilization mechanism is loud and is picked up by the camera's poor quality, but usable internal stereo microphone.

I used the 50mm mainly for the indoor shots and the zoom for the outdoor shots. I shot some of the outdoor night shots with the zoom, but then realized that the zoom doesn't do well in low light conditions since it has such a long zoom barrel. So just last week, I bought the 50mm. The 50mm fixed length (prime) lens really makes night shots clear with none of the spotty, dappled artifacts that you see with high ISO night shots. During the video, you'll notice those artifacts on the shot of the ferry.

Note that I used no filters on the shots..what you see in the video is truly what you get with the camera. As I gain expertise with the camera, I look forward to acquiring lenses over the next few years.

The Editing Process
The editing process has been a bit of a challenge, as the native output from the camera does not import cleanly into Cinelerra. Hence, I needed to transcode the native output into something more Cinelerra friendly, which I discuss in earlier posts:
/2009/01/first-edit-canon-5d-mark-ii.html
/2008/11/playing-tokyo-reality-in-1080p.html

I didn't want to revisit the conversion process, so I opted to use the MJPEG conversion command I previously discovered:
ffmpeg -i input.mov -b 3000k -vcodec mjpeg -ab 256k -ar 44100 -acodec libfaac -coder 1 -flags +loop -cmp +chroma -partitions +parti4x4+partp8x8+partb8x8 -subq 5 -me_range 16 -g 250 -keyint_min 25 -sc_threshold 40 -i_qfactor 0.71 output.mov

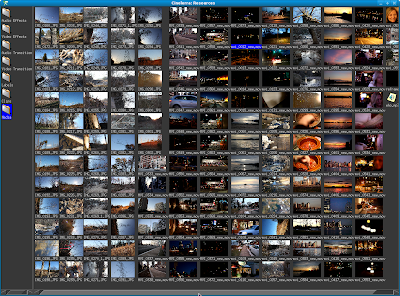
Once loaded in Cinelerra, I found I had quite a few assets from the last couple weeks of shooting.


If I could have one improvement made to the software, it would be to add folders to the Media bin in order to better manage assets.

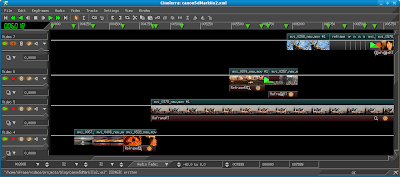
I went about editing the video as normal. I applied only time-based effects, like speeding up or slowing down the video, and transitions. The time-based effects were accomplished by attaching the ReframeRT video effect:


Output
I needed to output files from the project for different purposes:
1) to reimport back into Cinelerra (JPEG or MJPEG Quicktime video)
2) to export/render a format usable with my MG-350HD Media Player
(1080I/1080P MPEG2 video)
3) to export/render a format usable for Vimeo (720P MPEG2)

For #1, I exported a Quicktime for Linux container, using MJPEG compression. I just needed the video, so I had no audio on the export. I was able to reimport the resulting file easily into Cinelerra.

For #2, I rendered the video using a YUV4MPEG pipe. I needed to adjust the pipe command to export a different format and higher video bitrate.
mpeg2enc --verbose 0 --aspect 3 --format 13 --frame-rate 4 --video-bitrate 24000 --nonvideo-bitrate 384 --interlace-mode 0 --force-b-b-p --video-buffer 448 --video-norm n --keep-hf --no-constraints --sequence-header-every-gop --min-gop-size 6 --max-gop-size 6 -o %

Using mplex, I then combined the video stream with an existing audio track to an MPEG2 Program Stream:
mplex -f 3 -b 2000 canon5d.m2a canon5d.m2v -o canon5d.ps

Finally, I converted the program stream to an MPEG2 Transport Stream using vlc:
cvlc canon5d.ps --sout '#duplicate{dst=std{access=file,mux=ts,dst="canon5d.m2t"}}' vlc:quit

For #3, I reduced the 1080i/p output to 720P using FFMPEG:
ffmpeg -i canon5d.m2t -target ntsc-dvd -s 1280x720 -qscale 1 -threads 8 canon5d.mpg

Update 2008/01/13
I hadn't noticed before, but after I uploaded the 720P file to Vimeo, there was a little bit of a line on the bottom of the video. I am going to have to revisit the edit to make sure I didn't mess something up.
*** end update ***

I think the quality of the output can definitely be improved. However, I am glad that I was able to output to formats usable across different platforms (HDTV/Internet/Linux-Cinelerra).

Update 2008/02/08
I've been working on improving the quality of the output from Cinelerra. Specifically, instead of using MJPEG source files (the first conversion from the cam), I'm converting the Canon's video to MPEG2-TS. The MPEG2-TS format has very nice quality and edits quickly in Cinelerra. Here's the full skinny:
/2009/02/dark-of-winter-has-me-in-its-grasp.html
*** end update ***

In Sum
Dealing with a new media format in Linux and Cinelerra is never easy. But if you have patience, it is very satisfying to get a project done that makes your friends say "Wow" or have a laugh.

the mule

Saturday, January 03, 2009

Canon 5D Mark II video: Cinelerra edit

Well folks, I got myself quite a present for Christmas: the Canon EOS 5D Mark II:
http://www.usa.canon.com/consumer/controller?act=ModelInfoAct&fcategoryid=139&modelid=17662
Amazon: Canon EOS 5D Mark II

I've acquired a bit of video over the first few days with the cam. Now let's make sure I can edit the bloody stuff in Cinelerra! :)

Update 1/14/2009
I've done a full edit session with the output of the 5D. Lovely!
*** end update ***

I've found the following process works pretty well.

1) Convert video to a Cinelerra-usable format
As I explained in one of my earlier posts, mjpeg seems a good format to convert the H264 output of the cam:
[mule@ogre 2008_12_26]$ ffmpeg -i MVI_0072.MOV -b 3000k -vcodec mjpeg -ab 256k -ar 44100 -acodec libfaac -coder 1 -flags +loop -cmp +chroma -partitions +parti4x4+partp8x8+partb8x8 -subq 5 -me_range 16 -g 250 -keyint_min 25 -sc_threshold 40 -i_qfactor 0.71 mvi_0072.mov

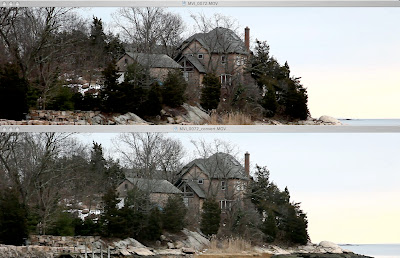
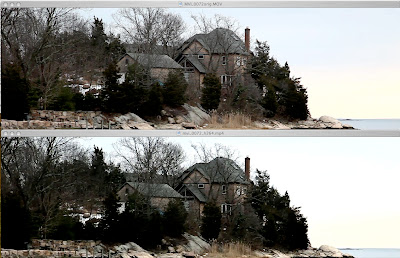
Here's an image that compares the original, Canon saved H264 video to the MJPEG conversion:


Pretty close, eh? The MJPEG video seems a little lighter and you can see more detail, though the colors are a little washed out.

2) Import into Cinelerra
Unlike the H264 format the Canon saves, the MJPEG conversion imports cleanly into Cinelerra without error messages. Also, on my dual, quad core Dell running Fedora 10, I get about 18fps playing back the raw video. Nice.

3) Render to YUV4MPEG stream as H264 video
I do this step in two parts:

a. Render the audio
The Canon stores its audio in 44Khz, 16-bit PCM format. I rendered out an MPEGI, Layer2 audio file:
--------------------------------------------
Input File : 'stdin' 44.1 kHz

Output File: '/mnt/videos/projects/2008_12_26/audioTrack.m2a'

256 kbps MPEG-1 Layer II j-stereo Psy model 1

[De-emph:Off Copyright:No Original:No CRC:Off]
[Padding:Normal Byte-swap:Off Chanswap:Off DAB:Off]
ATH adjustment 0.000000
--------------------------------------------
encode_init: using tablenum 0 with sblimit 27
Hit end of audio data

Avg slots/frame = 768.000; b/smp = 5.33; bitrate = 256.000 kbps
Render::run: Session finished.


b. Render a YUV4MPEG stream. Using the following pipe, I combine the audio track that was output in the previous step with the video that is being rendered:
ffmpeg -f yuv4mpegpipe -y -i - -i /mnt/videos/projects/2008_12_26/audioTrack.m2a -b 3000k -vcodec libx264 -ab 256k -ar 44100 -acodec libfaac -coder 1 -flags +loop -cmp +chroma -partitions +parti4x4+partp8x8+partb8x8 -subq 5 -me_range 16 -g 250 -keyint_min 25 -sc_threshold 40 -i_qfactor 0.71 %

Step B is very similar to the advanced rendering technique I showed you in the Beginner's Guide to Exporting Video from Cinelerra. Here's how the render looks in a terminal window:
Input #0, yuv4mpegpipe, from 'pipe:':
Duration: N/A, bitrate: N/A
Stream #0.0: Video: rawvideo, yuv420p, 1920x1080, 30.00 tb(r)
Input #1, mp3, from '/mnt/videos/projects/2008_12_26/audioTrack.m2a':
Duration: 00:00:28.42, start: 0.000000, bitrate: 255 kb/s
Stream #1.0: Audio: mp2, 44100 Hz, stereo, s16, 256 kb/s
Output #0, mp4, to '/mnt/videos/projects/2008_12_26/mvi_0072_h264.mp4':
Stream #0.0: Video: libx264, yuv420p, 1920x1080 [PAR 1:1 DAR 16:9], q=2-31, 3000 kb/s, 30.00 tb(c)
Stream #0.1: Audio: libfaac, 44100 Hz, stereo, s16, 256 kb/s
Stream mapping:
Stream #0.0 -> #0.0
Stream #1.0 -> #0.1
[libx264 @ 0x1ec6200]using SAR=1/1
[libx264 @ 0x1ec6200]using cpu capabilities: MMX2 SSE2Fast SSSE3 Cache64
frame= 852 fps= 5 q=5.0 Lsize= 18223kB time=28.35 bitrate=5265.6kbits/s
video:17680kB audio:526kB global headers:0kB muxing overhead 0.092246%
[libx264 @ 0x1ec6200]slice I:4 Avg QP:27.33 size: 74266
[libx264 @ 0x1ec6200]slice P:848 Avg QP:28.42 size: 21000
[libx264 @ 0x1ec6200]mb I I16..4: 61.4% 0.0% 38.6%
[libx264 @ 0x1ec6200]mb P I16..4: 16.9% 0.0% 2.2% P16..4: 28.4% 8.9% 1.0% 0.0% 0.0% skip:42.6%
[libx264 @ 0x1ec6200]final ratefactor: 35.54
[libx264 @ 0x1ec6200]SSIM Mean Y:0.9495821
[libx264 @ 0x1ec6200]kb/s:5099.9
Render::run: Session finished.


The Result
Comparing the resulting video, the quality seems acceptable, though a bit dark and drained of color in comparison to the original. Notice the removal of the color bands in the sky:


That's a bit of a bummer. I am going to have to investigate how to improve the quality, especially the color.

However, you can't argue with the efficiency of the file size of the H264. Here's a comparison of all three files:
-rw-r--r--    1 mule  ogre       138M Jan  3 16:04 MVI_0072orig.MOV (ORIGINAL)
-rw-r--r-- 1 mule ogre 164M Jan 3 16:02 MVI_0072_convert.MOV (MJPEG CONVERSION)
-rw-r--r-- 1 mule ogre 17M Jan 3 20:02 mvi_0072_h264.mp4 (H264 FINAL)

All in all, its still pretty cool.

Here is the video on Vimeo:
http://vimeo.com/2711794

Since I'm on Fedora, the Vimeo uploader seems to hang. So for Fedora (and I'm sure other Linux distributions) uploads seem to work better using the Basic Uploader:
http://www.vimeo.com/upload/video/basic
Thanks Raffa!

Keep you posted,
The Mule