http://crazedmuleproductions.blogspot.com/2007/04/transparent-png-as-rotating-image-on.html
Let's rotate it in Cinelerra!
I will do three things in this post:
1) load my project with only one video track, a static png image pulled to a length of 120 frames
2) apply a rotate effect to the track
3) use automatic keyframes to animate the rotate effect
Now, I must admit that I had misunderstood keyframing in Cinelerra. There are a number of ways to do keyframing, but when you work with effects, you will use automatic keyframing. Do yourself a favor and refresh your memory via the manual:
http://cvs.cinelerra.org/docs/cinelerra_cv_manual_en.html or the wiki:
http://cvs.cinelerra.org/docs/wiki/doku.php?id=english_manual:cinelerra_cv_en_17
First, I create a new project by typing "n" using the following specifications:
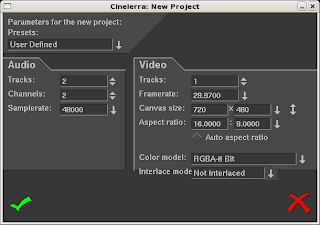
After we've loaded the project, we will have three preexisting tracks (two audio and one video track). Moving the cursor over any track and clicking the letter "d" to delete the last track on the timeline. We click "d" three times to delete the tracks.
Now, we load the png image I created in the last post noted above:
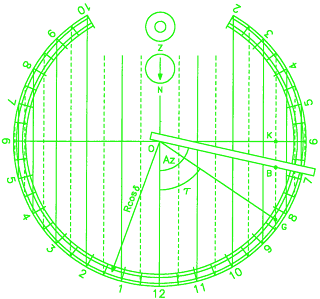
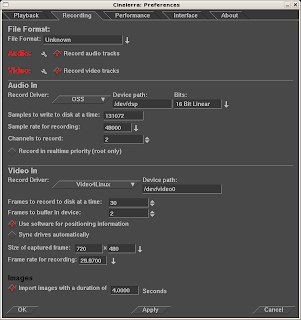
However, before we add this image as a new resource, a nice feature of Cinelerra is the ability to import images to a specific length onto the timeline. This is configured in Preferences -> Recording. Don't ask me why it is in the Recording dialog, but therein lies the Images section with one checkbox: "Import images with a duration of ." We will change this value to 4 seconds and click OK:
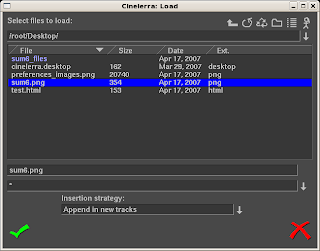
Now we can append the compass png to a new track by pressing the "o" key to Load a new resource. Before we select our png, we make sure to change the Insertion Strategy to Append in New Tracks:
The png will appear on the timeline with a length of four seconds. From the Resources box, pull a Rotate video effect on top of the track. We should now have a screen that looks like this:
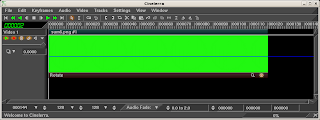
We will now rotate our image. To do this, we will learn how to auto keyframe. For automatic keyframing to work, you first must have the little key icon ("Generate keyframes while tweeking") selected in either the project/timeline view or the compositor:
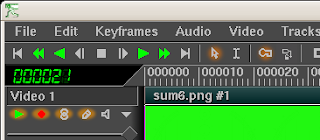
Once the key icon is lit, we will put the insertion point at equal intervals of 0 frames, 30 frames, 60 frames, 90 frames and 120 frames and set keyframe points. To do this, first move the insertion point to the beginning of the timeline, the 0 frame mark. In order to get frames to be the unit of measure on the time bar, cycle through the different time bar measurement options by clicking Shift-click while your mouse is on top of the time bar. Also make sure that Settings -> Align to Frames is chosen.
Once the insertion point is on our first 0 frame mark, go ahead and click the magnifying glass icon on the Rotate effect. The effect shows default degrees of rotation as well as a custom degree text box. Pivot on X and Y coordinates may be selected, but we will not change these values. Draw pivot simply puts a crosshair on the output.
We will keep it simple and set this first rotation point to 0 degrees:
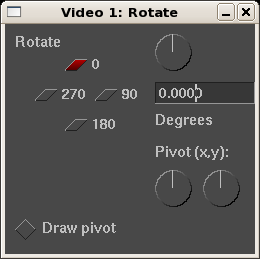
Have the Compositor window showing while you perform the next few rotate keyframes. Repeat this process of selecting a new insertion point and increasing the rotation. Set the 30 frame mark to 90 degrees, the 60 frame mark to 180 degrees, the 90 frame mark to 270 degrees and the 120 frame mark to 360 degrees. As you change keyframes, you should see the output in the compositor change as well. At the end of the process, you should now have a timeline that looks something like this:

Once all the keyframe points are set, deselect the "Generate keyframes while tweeking" icon. We do this so in case we inadvertantly press a key, we don't start generating keyframes unknowingly. After the keyframes are set, set the insertion point back to the beginning of the timeline by pressing CTRL-left arrow and hit the spacebar to replay.
Et Voila! You should have successfully rotated your image! Thank Cinelerra's interpolation engine for the way that the intervening frames are rendered in the video playback. Nice!
Soon, I will post the rendered result for you to compare your results. And in my next post, we'll apply the perspective effect to make the rotate MUCH cooler!

1 comment:
Thanks Marry!
CM
Post a Comment