Showing posts with label cinelerra. Show all posts

Saturday, April 20, 2013

a simple way to render H264 content directly from Cinelerra

Use presets!
The FFmpeg encoding guide has excellent information on using presets:
http://ffmpeg.org/trac/ffmpeg/wiki/x264EncodingGuide

At the time of this writing, by running:
ffmpeg -i input -c:v libx264 -preset -tune dummy.mp4

I see that the available presets are:
ultrafast
superfast
veryfast
faster
fast
medium
slow
slower
veryslow
placebo

So really, all you need to do is translate that simple one liner into the Cinelerra YUV4MPEG Stream:
 ffmpeg -y -i - -threads 12 -c:v libx264 -preset medium %

Like so:


WahLah!  Easy-peasy conversion to H264.
CM

Reference:
FFmpeg x264 Encoding Guide

Saturday, December 29, 2012

convert video into an animated gif

Why would someone want to do that?  One use would be to use the animated gif as a profile pic on a social media site or an avatar for a user forum..those are two cases I can think of.

I wanted to convert this short video into an animated gif loop.  The below timelapse was acheived by using the FPS override function of the MagicLantern firmware upgrade for the Canon 5D:


In order to convert the movie, I did two things:
1) in Cinelerra, export a JPG sequence
2) use ImageMagick "convert" to convert to an animated gif

Export a JPG sequence
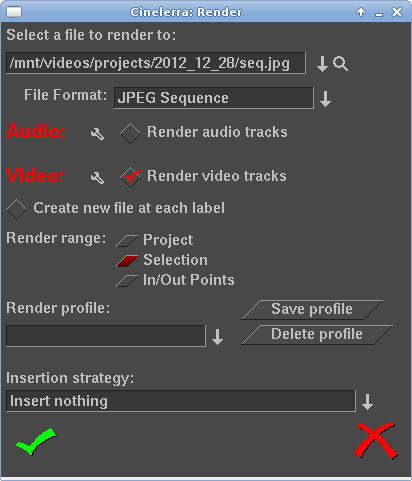
1) In Cinelerra, you can export your movie as a JPG sequence (among other choices like an EXR/PNG/TGA or TIFF image sequence):

Depending on the number of frames you're exporting, you'll get a whole bunch of files saved to your hard drive.  Since my project was set to 24fps, I had about 120 files saved to my filesystem.  The file names start and end with the number of the frames you selected to export (shown in this screen cap of the Cinelerra timeline):

Here's how the sequence of JPEGs looks in the filesystem:
-rw-rw-r--. 1 sodo sodo   1302637 Dec 28 19:50 seq000373.jpg
-rw-rw-r--. 1 sodo sodo   1304670 Dec 28 19:50 seq000374.jpg
...
-rw-rw-r--. 1 sodo sodo   1296049 Dec 28 19:50 seq000490.jpg
-rw-rw-r--. 1 sodo sodo   1297281 Dec 28 19:50 seq000491.jpg
-rw-rw-r--. 1 sodo sodo   1298527 Dec 28 19:50 seq000492.jpg


Once you've export all the single images from Cinelerra, use ImageMagick's "convert" program to assemble the individual images into an animated gif.  Since I wanted to resize the 1080P resolution images (1920x1080) into 1/8th the size of the original, I used 240x135 as the resize value.  You can see I've used other specifiers as well:
-delay 0 (no delay between frames)
-loop 0 (infinitely loop the gif)
seq*.jpg (convert is smart enough to assemble the jpgs in ordered sequence)
the other specifiers are essentially "high quality" output settings

[sodo@computer 2012_12_28]$ convert -resize 240x135 -colorspace RGB +sigmoidal-contrast 11.6933 -sigmoidal-contrast 11.6933 -colorspace sRGB -define filter:filter=Sinc -define filter:window=Jinc -define filter:lobes=3 -delay 0 -loop 0 seq*.jpg anim2.gif

The result is a thumbnail of the gif:

Neato.
da mule

Thursday, January 26, 2012

recording desktop with ffmpeg

I had this idea that I'm going to start interviewing folks on different technical topics via Skype or Google Hangout.  Normally, I would use Cinelerra to perform this task, but for some reason, the recordings in Cinelerra showed some irritating sound artifacts.  Testing in audacity showed no such audio problems.  I'll bring this up on the Cin mailing list soon.

FFmpeg to the Rescue
So with Cinelerra not working for desktop recordings, I needed an alternate way to record my desktop screen as well as the audio from the person being interviewed.  After some searching a good deal of trial and error, I found from the link in the reference section at the bottom of the page, a very nice ffmpeg command.  You can save to any format you want.  The example below shows how to save the microphone audio (hw:0,0) in PCM format.  The desktop video is brought in via the xllgrab format specifier :
ffmpeg -f alsa -i hw:0,0 -ac 2 -ar 48000 -acodec pcm_s16le -f x11grab -r 24 -s 1280x720 -i :0.0 -aspect 16:9 -vcodec libx264 -vpre lossless_ultrafast -threads 8 -y output.mov

I later tweaked the command to do a bit more, using pulse audio as input as well as saving out to an iPod compatible format:
ffmpeg -f alsa -i pulse -f x11grab -s 1280x720 -r 23.98 -i :0.0 -vcodec libx264 -acodec pcm_s16le -ab 128k -ar 48000 -ac 1 -b 2000k -bt 750k -refs 1 -deblockalpha 0 -deblockbeta 0 -subq 1 -me_range 21 -bf 0 -level 30 -g 300 -keyint_min 30 -sc_threshold 40 -rc_eq 'blurCplx^(1-qComp)' -qcomp 0.7 -qmax 51 -qdiff 4 -i_qfactor 0.71428572 -maxrate 2000k -bufsize 2M -cmp 1 -threads 8 output.mov

Errors
Not sure how yet to resolve these ffmpeg errors:
[alsa @ 0x16512a0] Estimating duration from bitrate, this may be inaccurate
Input #0, alsa, from 'hw:0,0':
  Duration: N/A, start: 17479.447401, bitrate: N/A
    Stream #0.0: Audio: pcm_s16le, 32000 Hz, 2 channels, s16, 1024 kb/s
[x11grab @ 0x1650240] device: :0.0 -> display: :0.0 x: 0 y: 0 width: 1280 height: 720
[x11grab @ 0x1650240] shared memory extension found
[x11grab @ 0x1650240] Estimating duration from bitrate, this may be inaccurate
Input #1, x11grab, from ':0.0':
  Duration: N/A, start: 1327197224.425685, bitrate: 707788 kb/s
    Stream #1.0: Video: rawvideo, bgra, 1280x720, 707788 kb/s, 24 tbr, 1000k tbn, 24 tbc
Incompatible pixel format 'bgra' for codec 'libx264', auto-selecting format 'yuv420p'

Along the way, I received an error:
"unknown field slave"

Finding a bit more about ALSA
This ended up being because I had edited my /etc/asound.conf file from the default.  This corrupted my sound card settings.  I was reacquainted with some debugging commands and places where "sound stuff" lives:
[sodo@computer etc]$ arecord -l
**** List of CAPTURE Hardware Devices ****
card 0: U0x46d0x821 [USB Device 0x46d:0x821], device 0: USB Audio [USB Audio]
  Subdevices: 0/1
  Subdevice #0: subdevice #0
card 2: MobilePre [MobilePre], device 0: USB Audio [USB Audio]
  Subdevices: 0/1
  Subdevice #0: subdevice #0

[sodo@computer etc]$ amixer -c 2
Simple mixer control 'Speaker',0
  Capabilities: pvolume pswitch pswitch-joined penum
  Playback channels: Front Left - Front Right
  Limits: Playback 0 - 31
  Mono:
  Front Left: Playback 31 [100%] [0.00dB] [on]
  Front Right: Playback 31 [100%] [0.00dB] [on]
Simple mixer control 'PCM',0
  Capabilities: pvolume pswitch pswitch-joined penum
  Playback channels: Front Left - Front Right
  Limits: Playback 0 - 31
  Mono:
  Front Left: Playback 25 [81%] [0.00dB] [on]
  Front Right: Playback 25 [81%] [0.00dB] [on]
Simple mixer control 'PCM',1
  Capabilities: volume volume-joined penum
  Playback channels: Mono
  Capture channels: Mono
  Limits: 0 - 2
  Mono: 2 [100%]
Simple mixer control 'Analog In',0
  Capabilities: pvolume cvolume pswitch pswitch-joined cswitch cswitch-joined penum
  Playback channels: Front Left - Front Right
  Capture channels: Front Left - Front Right
  Limits: Playback 0 - 31 Capture 0 - 31
  Front Left: Playback 28 [90%] [6.00dB] [off] Capture 31 [100%] [12.00dB] [on]
  Front Right: Playback 28 [90%] [6.00dB] [off] Capture 31 [100%] [12.00dB] [on]


[sodo@computer ~]$ cat /proc/asound/cards
 0 [U0x46d0x821    ]: USB-Audio - USB Device 0x46d:0x821
                      USB Device 0x46d:0x821 at usb-0000:00:1d.7-6, high speed
 1 [MobilePre      ]: USB-Audio - MobilePre
                      M Audio MobilePre at usb-0000:00:1d.0-1, full speed

[sodo@computer etc]$ ls /dev/snd
by-id  by-path  controlC0  controlC2  pcmC0D0c  pcmC2D0c  pcmC2D0p  seq  timer

[sodo@computer etc]$ cat /etc/asound.conf
#
# Place your global alsa-lib configuration here...
#

@hooks [
{
func load
files [
"/etc/alsa/pulse-default.conf"
]
errors false
}
]

XWinInfo
Also, I learned about xwininfo, a cool command that shows you your desktop settings:
[sodo@computer videoConfTest]$ xwininfo
xwininfo: Window id: 0x320003b "Hak5 - Linux Screen Recording, Boxee Python Development and Qnext - YouTube - Google Chrome"

  Absolute upper-left X:  0
  Absolute upper-left Y:  53
  Relative upper-left X:  0
  Relative upper-left Y:  22
  Width: 1280
  Height: 971
  Depth: 24
  Visual: 0x21
  Visual Class: TrueColor
  Border width: 0
  Class: InputOutput
  Colormap: 0x20 (installed)
  Bit Gravity State: NorthWestGravity
  Window Gravity State: NorthWestGravity
  Backing Store State: NotUseful
  Save Under State: no
  Map State: IsViewable
  Override Redirect State: no
  Corners:  +0+53  -1280+53  -1280-0  +0-0
  -geometry 1280x971+0-0

Finally, I installed Skype and dealt with resolving a bunch of dependency problems (as usual):

VideoCamming
And a simple way to trigger mplayer to open up your videocam:
mplayer tv:// -tv driver=v4l2 device=/dev/video0

Another simple way to capture the output:
ffmpeg -f alsa -i hw:0 -f video4linux2 -s 320x240 -i /dev/video0 out.mpg

Or a more complex example, saving the video into an iPod friendly format:
ffmpeg -f alsa -i pulse -f video4linux2 -i /dev/video0 -aspect 16:9 -s 1280x720 -r 23.98 -vcodec libx264 -acodec libfaac -ab 128k -ar 48000 -ac 1 -b 2000k -bt 750k -refs 1 -deblockalpha 0 -deblockbeta 0 -subq 1 -me_range 21 -bf 0 -level 30 -g 300 -keyint_min 30 -sc_threshold 40 -rc_eq 'blurCplx^(1-qComp)' -qcomp 0.7 -qmax 51 -qdiff 4 -i_qfactor 0.71428572 -maxrate 2000k -bufsize 2M -cmp 1 -threads 8 output.mov

Finally, guvcview is a very nice program to control one's videocam:

Reference
http://www.linuxquestions.org/questions/linux-newbie-8/recording-desktop-with-ffmpeg-877580/
http://www.youtube.com/watch?v=mNz5Lrc06_s
http://forums.fedoraforum.org/showthread.php?t=256681
http://ffmpeg.org/ffprobe.html#pulse
http://alien.slackbook.org/blog/adding-an-alsa-software-pre-amp-to-fix-low-sound-levels/
http://forums.opensuse.org/english/get-technical-help-here/multimedia/471522-record-my-desktop-using-ffmpeg-post2433494.html
http://superuser.com/questions/251338/mencoder-capture-from-camera-and-microphone
http://ubuntuforums.org/showthread.php?t=1556038 (using jack)
http://wiki.linuxaudio.org/wiki/screencasttutorial (jack_capture)
https://help.ubuntu.com/community/Webcam (webcam)
http://howto-pages.org/ffmpeg/ (a nice, human readable version of the FFmpeg doc)
http://www.tldp.org/HOWTO/Alsa-sound-6.html (amixer settings)

Sunday, May 29, 2011

Fedora 15 cinelerra install works, breaks MP2

Fedora 15, x86-64 Cinelerra CV install from source
The Fedora 15, x86-64 installation of Cinelerra went well. I followed my previous Fedora 12, x86-64 installation instructions from my document here:
http://crazedmuleproductions.blogspot.com/2010/02/fedora-12-x86-64-cinelerra-install.html

The same instructions apply, along with the RPM build of FFMPEG for libfaac, the Apple Audio Codec.

Remove Video for Linux and IOMega Buzz drivers
Before I compiled the latest Cinelerra CV, I had to patch the codebase to remove Video for Linux and IOMega Buzz drivers, as they are not supported under the kernel (kernel 2.6.38) that Fedora 15 runs under. Here is the patch:
http://e.kevb.net/lurker/message/20110522.154000.ac0bc424.en.html

MPEG2 audio rendering broken
Once I got the code compiled, I tried reading and encoding video. An immediate problem I noticed is that MPEG Layer II encoding is broken. The rendering output gives no indication that there is a problem:
Input File : 'stdin' 48.0 kHz Output File: '/home/sfrase/videos/stormpigs/2010_12_28/testmp2monty_384.m2a' 384 kbps MPEG-1 Layer II j-stereo Psy model 1 [De-emph:Off Copyright:No Original:No CRC:Off] [Padding:Normal Byte-swap:Off Chanswap:Off DAB:Off] ATH adjustment 0.000000 -------------------------------------------- encode_init: using tablenum 0 with sblimit 27 Hit end of audio data Avg slots/frame = 1152.000; b/smp = 8.00; bitrate = 384.000 kbps Render::run: Session finished.

However, both mplayer and ffplay spit out similar messages that the MP2 has a header missing:
mplayer
Opening audio decoder: [ffmpeg] FFmpeg/libavcodec audio decoders
AUDIO: 48000 Hz, 2 ch, floatle, 384.0 kbit/12.50% (ratio: 48000->384000)
Selected audio codec: [ffmp2float] afm: ffmpeg (FFmpeg MPEG layer-1 and layer-2 audio)
==========================================================================
AO: [pulse] 48000Hz 2ch floatle (4 bytes per sample)
Video: no video
Starting playback...
[mp2float @ 0x327153c6a0]Header missing
[mp2float @ 0x327153c6a0]Header missing
A: 0.0 (00.0) of 342.7 (05:42.6) ??,?%


FFplay
Input #0, mp3, from 'testmp2monty_384.m2a':
Duration: 00:05:42.67, start: 0.000000, bitrate: 384 kb/s
Stream #0.0: Audio: mp2, 48000 Hz, stereo, s16, 384 kb/s
[mp2 @ 0x7f27c8000af0] Header missing


Playing back the audio is garbled. This isn't a deal breaker, but it is a little upsetting. I thought I might escape it this time, but I guess I will have to bite the bullet and compatibility test all my Cinelerra file formats with Fedora 15.

Compiling Cinelerra Monty from source
Since Cinelerra CV worked at a basic level, I wanted to compile my preferred Cinelerra distro, Cinelerra Monty:
http://crazedmuleproductions.blogspot.com/2010/07/green-beret-parachutes-in-to-help.html

However, this codebase also needed the updates to remove Video for Linux and IOMega Buzz drivers. Since Monty's code base differs from CV, I had to manually patch the code myself using the instructions above. Once that was complete, I was able to successfully compile CinMonty.

References
http://bugs.cinelerra.org/ticket/949
Nicola's patch
Creating a patch using Diff

Thursday, September 23, 2010

finding mem leaks with valgrind

I had been playing around with CinMonty for a couple weeks now and noticed a fairly big memory leak when I played back or rendered MPEG-PS or the AVC files from my Canon 5D(actually, H264/PCM audio). It must be stated that though I took some programming in school, I'm no C programmer. Handy with the shell, but not a C programmer. In any case, I found it interesting to try and find a memory leak in Cinelerra Monty using valgrind, a profiler/instrumenter/error detector of C programs.

Starting Valgrind
Valgrind is executed at the command line with the name of the program that valgrind will analyze. You can start valgrind with plenty of options, but I started with a few common arguments:
-check for leaks
-log to a file
-log unlimited errors

The command line looks like this:
[mule@ogre 2010_09_22]$ valgrind --leak-check=full --log-file=memLeakCinMonty.txt --error-limit=no cinelerra
Cinelerra 2.1CV
xiphmont
GIT::a515d4be161fde852b72471f631782debf5d32f5
(C) 2006 Heroine Virtual Ltd.
(C) 2006-2010 The CinelerraCV Community
Internal ffmpeg 0.6+fixes
Compiled on Sat Sep 18 14:04:36 EDT 2010

Cinelerra is free software, covered by the GNU General Public License,
and you are welcome to change it and/or distribute copies of it under

certain conditions. There is absolutely no warranty for Cinelerra.
FFMPEG::init_picture failed


I'm not sure what the init_picture failed error messages are, but they occur when I playback or render MPEG-PS or H264 video. This may have something to do with the memory leak.

When running cinlerra under valgrind, the performance of Cinelerra grinds to a halt. Perhaps that's why Julian Seward (the original designer and author of Valgrind) called it valGRIND. However, performance is not so bad that you can't get usable data out of the program. For instance, valgrind shows me the following interesting section..an overlap in memcpy:
==23140== Thread 36:

==23140== Source and destination overlap in memcpy(0x3ce5e1b0, 0x3ce7e1b0, 526848) ==23140== at 0x4A06A3A: memcpy (mc_replace_strmem.c:497)
==23140== by 0x569092: FileBase::update_pcm_history(long) (filebase.C:105)
==23140== by 0x5872F5: FileFFMPEG::read_samples(double*, long) (fileffmpeg.C:648) ==23140== by 0x56ACAA: File::read_samples(double*, long, long, float*) (file.C:1042) ==23140== by 0x500CAE: AModule::render(double*, long, int, int, int, int) (amodule.C:258)
==23140== by 0x658543: VirtualANode::read_data(double*, long, long, long) (virtualanode.C:161)

==23140== by 0x658820: VirtualANode::render_as_module(double**, double*, long, long, long) (virtualanode.C:238)
==23140== by 0x65897A: VirtualANode::render(double*, long, long, long) (virtualanode.C:178)
==23140== by 0x6576F7: VirtualAConsole::process_buffer(long, long, int, long) (virtualaconsole.C:134)
==23140== by 0x502B06: ARender::process_buffer(long, long) (arender.C:232)
==23140== by 0x502969: ARender::run() (arender.C:325)
==23140== by 0x51B4425: Thread::entrypoint(void*) (thread.C:69)


It's good that valgrind found something. Now to fix it! I've handed this info off to Monty. Hopefully he will be able to replicate my problem and fix it.
:)
the mule

Friday, September 10, 2010

making sure opengl is available

This troubleshooting is listed in this post:
https://init.linpro.no/pipermail/skolelinux.no/cinelerra/2010-January/016493.html

But I thought I'd repost here so that I always have this information at hand:

I have a GeForce 8800GT card installed in my box. I see glxinfo says I have OpenGL:
[sfr...@ogre my_cinelerra]$ glxinfo | head -20
name of display: :0.0
display: :0 screen: 0
direct rendering: Yes
server glx vendor string: NVIDIA Corporation
server glx version string: 1.4


I see glxgears points to the libGL.so.1 in /usr/lib64/nvidia:
[sfr...@ogre my_cinelerra]$ ldd `which glxgears`
linux-vdso.so.1 => (0x00007fff85dff000)
libGL.so.1 => /usr/lib64/nvidia/libGL.so.1 (0x00007f791fa75000)
libm.so.6 => /lib64/libm.so.6 (0x0000003f1bc00000)
libX11.so.6 => /usr/lib64/libX11.so.6 (0x0000003f1e800000)
libpthread.so.0 => /lib64/libpthread.so.0 (0x0000003f1c400000)
libc.so.6 => /lib64/libc.so.6 (0x0000003f1b800000)

libGLcore.so.1 => /usr/lib64/nvidia/libGLcore.so.1 (0x00007f791e5a3000) libnvidia-tls.so.1 => /usr/lib64/nvidia/tls/libnvidia-tls.so.1 (0x00007f791e4a1000)

libXext.so.6 => /usr/lib64/libXext.so.6 (0x0000003f1ec00000)
libdl.so.2 => /lib64/libdl.so.2 (0x0000003f1c000000)
libxcb.so.1 => /usr/lib64/libxcb.so.1 (0x0000003f1e400000)
/lib64/ld-linux-x86-64.so.2 (0x0000003f1b400000)
libXau.so.6 => /usr/lib64/libXau.so.6 (0x0000003f1e000000


I see that the libGL.so.1 in that directory has the appropriate OpenGL hooks:
[sfr...@ogre usr]$ strings -a /usr/lib64/nvidia/libGL.so.1 | grep glDeleteShader
glDeleteShader
[sfr...@ogre usr]$ strings -a /usr/lib64/nvidia/libGL.so.1 | grep glUseProgram
glUseProgram
glUseProgramObjectARB


I've tried manually pointing configure.in to the /usr/lib64/nvidia directory:
AC_CHECK_LIB([GL], [glUseProgram],
[OPENGL_LIBS="-lGL"; libGL=yes],
# On SUSE/OpenSUSE, NVidia places the OpenGL 2.0 capable library in
/usr/X11R6/lib
# but it doesn't place a libGL.so there, so the linker won't pick it up
# we have to use the explicit libGL.so.1 path.
save_LIBS="$LIBS"
for l in /usr/lib64/nvidia /usr/X11R6/lib /usr/X11R6/lib64; do
LIBS="$l/libGL.so.1"
AC_MSG_CHECKING(for glUseProgram in $l/libGL.so.1)
AC_TRY_LINK([],[extern int glUseProgram();
glUseProgram();],
[OPENGL_LIBS="$l/libGL.so.1";
libGL=yes],[libGL=no])
AC_MSG_RESULT([$libGL])
test $libGL = yes && break
done
LIBS="$save_LIBS"


In the end, even though ./configure did not recognize that I had openGL properly installed, I had to explicitly enable opengl on my ./configure line:
./configure --enable-opengl

Who knew?
da mule

Friday, July 16, 2010

Green Beret parachutes in to help Cinelerra

Unbelievably, just in the past week, the Cinelerra CV community (http://cvs.cinelerra.org/) has had a heavyweight developer parachute in and start fixing stuff all over the place. The guy is Chris "Monty" Montgomery who developed the Ogg multimedia container and Vorbis audio formats (http://en.wikipedia.org/wiki/Chris_Montgomery). He is a developer currently working for Red Hat.

Monty, You're The Man!
His primary effort has been to yank out the kludgy and incompatible file loader in Cinelerra and replace it using good old FFmpeg. FFmpeg has problems of its own, but a helluva lot less problems than the Cinelerra loader. This is a task that the original developer of Cinelerra, Heroine Warrior (http://www.heroinewarrior.com/), has wisely done with the 4.1 version of Cinelerra. Much props to Father HV, for without him, this blog and Open Source video editing would be very different, if exist at all.

Monty is patching the version of FFmpeg that comes with the Cinelerra CV source code (http://cinelerra.org/getting_cinelerra.php). In Cinelerra CV's source code tree, FFmpeg is found under quicktime/ffmpeg. This means that once you compile Cinelerra from source code and add Monty's code fixes, files like the Canon 5D/7D H264 AVC files (the 1080P files spat out of the Canons') will load natively in Cinelerra.

AVC, oh AVC, Why Are You So Stubborn?
Problem here is that you can't really edit with AVC files because the decoding of them is so bloody CPU intensive. AVC playback in Cinelerra on my dual, quad core Dell SC1430 with 10GB RAM is 3-4fps. This is unacceptable for previewing edits. There is a workaround to this such that if you really wanted to edit AVC, you'd need to have background rendering enabled, make your edits and then wait for the background render to finish. But that bg render takes a long time too. You could speed this up to by creating a ramdisk (http://www.techanswerguy.com/2009/02/creating-ramdisk-in-linux.html) and setting the background render to use that ramdisk. But that's a whole other task.

Transcoding Canon 5D/7D Files, as usual
Thus, we're still left with the task of transcoding Canon 5D/7D files into a more compatible format. There are two solutions:
1) get my varied MPEG-TS conversion magic to work for you (http://crazedmuleproductions.blogspot.com/2009/02/dark-of-winter-has-me-in-its-grasp.html)
2) convert the 5D/7D files using FFmpeg into another format that works since FFmpeg is now Cinelerra's loader (with Monty's additions)

Both require research/work, but I did a quick conversion that I tested in Cinelerra with Monty's code additions:
ffmpeg -i [inputFileFromCanon] -acodec mp2 -ar 48000 -ab 384k -ac 2 -vcodec mpeg2video -qscale 1 [outputFile]

The audio format is mpeg, layer II and the video format is mpeg2video. This loads in Cinelerra and is fast to edit with. Once edited, render out from Cinelerra as usual.

How to Compile Cinelerra for Ubuntu and Fedora users
So Monty's additions require compiling from source. I'll provide some quick links here. For Ubuntu folks, Raffaella Traniello has put a nice post together on how to compile Cinelerra in Ubuntu:
http://www.g-raffa.eu/Cinelerra/HOWTO/compilation.html

For Fedora users, I have a post here:
http://crazedmuleproductions.blogspot.com/2010/02/fedora-12-x86-64-cinelerra-install.html

Get Monty's Additions Working
Once you get the source code compiled, install it (make install) and just test that Cinelerra works at a basic level. Once you've tested that your compile has worked, move onto apply Monty's code additions:
- remove your installed Cinelerra (make uninstall)
- download Monty's additions at http://people.xiph.org/~xiphmont/cinelerra/patches/
- apply each of them to the Cinelerra source code tree one at a time (git apply [patch name])
or join in Monty's git branch:
1) git remote add xiphmont git://git.xiph.org/users/xiphmont/cinelerraCV.git
2) git remote update
- compile Cinelerra, this time with all Monty's additions (make clean;make;make install)

After starting CinCV with Monty's additions, you should see the startup info change:
[mule@ogre my_cinelerra]$ cinelerra
Cinelerra 2.1CVxiphmont
GIT::8c01c13bbb21d30aff2733454a49fbfe641e51ca
(C) 2006 Heroine Virtual Ltd.
(C) 2006-2010 The CinelerraCV Community
Internal ffmpeg 0.6+fixes
Compiled on Fri Jul 16 20:40:38 EDT 2010


As well, you should see that FFmpeg becomes the default loader for videos in you goto the Resources window, right-click on a video and click "Info". You should see FFMPEG there under File Format:


A Few Git Notes..
While I'm at it..

View current git branches
[mule@ogre my_cinelerra]$ git branch
* master

Add Monty's remote branch
[mule@ogre my_cinelerra]$ git remote add xiphmont git://git.xiph.org/users/xiphmont/cinelerraCV.git

Update the local copy of Monty's remote branch
[mule@ogre my_cinelerra]$ git remote update
Fetching origin
Fetching xiphmont
remote: Counting objects: 2754, done.
remote: Compressing objects: 100% (1904/1904), done.
remote: Total 1981 (delta 997), reused 0 (delta 0)
Receiving objects: 100% (1981/1981), 2.77 MiB 1.07 MiB/s, done.
Resolving deltas: 100% (997/997), completed with 711 local objects.
From git://git.xiph.org/users/xiphmont/cinelerraCV
* [new branch] master -> xiphmont/master


Check that Monty's branch has been added
[mule@ogre my_cinelerra]$ git branch
* master
xiphmont

I then was able to switch branches
[mule@ogre my_cinelerra]$ git checkout -b xiphmont xiphmont/master
Branch xiphmont set up to track remote branch master from xiphmont.
Switched to a new branch 'xiphmont'


"git branch" shows that I have switched to Monty's branch
[mule@ogre my_cinelerra]$ git branch
master
* xiphmont

Now I can switch easily between branches (Monty's and CinelerraCV)
[mule@ogre my_cinelerra]$ git checkout master
Switched to branch 'master'


Switching to Monty's branch
[mule@ogre my_cinelerra]$ git checkout xiphmont
Switched to branch 'xiphmont'


Show the current status of the git code repositories
[sfrase@ogre my_cinelerra]$ git status | head -6
# On branch xiphmont
# Untracked files:
# (use "git add ..." to include in what will be committed)
#
# cinelerra-cvs-current.spec
# cinelerra/.deps/
>


View the latest change log
[mule@ogre my_cinelerra]$ git log xiphmont/master | head -6
commit 8c01c13bbb21d30aff2733454a49fbfe641e51ca
Author: Monty
Date: Fri Jul 16 07:30:10 2010 -0400

iAlter/extend versioning to avoid any confusion between this temporarily
forked version and the main CinelerraCV repo

Pull in the latest code updates:
[mule@ogre my_cinelerra]$ git pull


Troubleshooting
I tried to switch branches and got this error
[mule@ogre my_cinelerra]$ git checkout -b xiphmont xiphmont/master
error: You have local changes to 'po/de.po'; cannot switch branches.

I did a hard reset to clear the above error
[mule@ogre my_cinelerra]$ git reset --hard HEAD
HEAD is now at d95887f Pass --libdir given to configure on to ffmpeg configure.

Last resort for repos not working, a destructive clean:
[mule@ogre my_cinelerra]$ git clean -dfx


Update 2010/07/16
Looks like the YUV4MPEG render stream is broken..this simple render pipe outputs a file unreadable in FF
ffmpeg -f yuv4mpegpipe -i - -y -target dvd -f mpeg2video %

I talked to Monty and he will fix..something about colorspace converter.
*** end update ***

Note that you have to compile Cinelerra and do a full reinstall, as the Cinelerra "make" process hard links the installation directory into the cinelerra executable.

So I hope Monty stays with us as long as possible. Thanks man! Hope springs eternal!
the mule

References
http://www.itworld.com/open-source/115063/breaking-open-video-frontier-despite-mpeg-la

Monday, April 12, 2010

automating repetitive tasks by scripting Cinelerra, part II

This is a follow up to my earlier article:
/2010/01/automating-repetitive-tasks-by.html

Saving Time
In this entry, I discuss writing a shell script that automatically adds a second video track to your Cinelerra project. This comes in handy for projects that you do repeatedly. For example, a weekly podcast that uses a standard watermark.

For instance, I produce a monthly podcast for my band. You can see the pig watermark in the screen cap below:
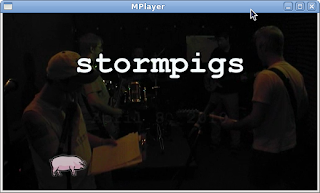

In Cinelerra, the pig watermark is created by adding a second video track to my base Cinelerra project. This second video track includes a jpg stretched to the length of the first video track. Also, there is a chroma key effect applied to the pig track in order for it to be transparent against the background of the jam video.

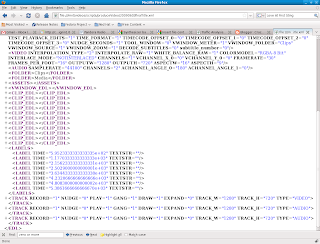
The two items, a graphic of a pig and a video track with the image of the pig and applied effects are represented by XML in the Cinelerra EDL. Remember, the Cinelerra EDL (edit decision list) is the XML file that represents all the edits that you've performed in creating your video masterpiece. It looks like this:

In this blog post, I will show you a shell script that inserts these two chunks of XML into a basic Cinelerra project file. For my script to work properly, note that the base project needs at least one video track and at least one label. I'll get into the reason for that later. The basic project file can also have audio tracks as well.

The Asset, the Asset EDL and the Video Track EDL
One asset and two sections of XML represent the video track of the pig:
1) Here is the graphic of the pig, as a Google Doc.

2) Here is the EDL of the asset (pig2.jpg):

The EDL is also available in a Google Doc.

3) Here is the EDL of the video track of the pig:
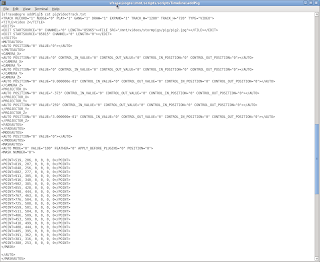
The full EDL is also available as a Google Doc.

Since I use the pig watermark on each podcast, I reuse the two chunks of XML above for each installment of my monthly podcast. So I've saved both the asset and the video track XML above from an older project to separate files (pigAsset.txt and pigVideoTrack.txt). Using the shell script, I will insert both of these files at the appropriate places in my base Cinelerra project (my latest podcast). To make life simple, my base project has only one track, the video track of the band rehearsal.

Disclaimer
You're probably saying that this seems like a lot of work and you maybe getting confused. Well..it kind of is a pain in the ass, but it will be worth it when you can whip out a shell script and automatically add your watermark to your project! But I digress..

Shell Script Fun
Here is the meat of the script:
PWD=/mnt/scripts/scriptsTimeline/addPig
ASSET=$PWD/pigAsset.txt
TRACK=$PWD/pigVideoTrack.txt
OLDLENGTH=85965
NEWLENGTH=$(videoLength.sh $INPUT)

echo "OLDLENGTH is $OLDLENGTH"
echo "NEWLENGTH is $NEWLENGTH"
echo "INPUT is $INPUT"
echo "OUTPUT is $OUTPUT"

# adds both via a pipe WORKING
sed -e "s/^<\/ASSETS>/<\!-- $REM -->/g" $INPUT | sed -e "/<\!-- $REM -->/r $ASSET" | sed -e "/LABEL TIME/,/^<\/LABELS/{ /<\/LABELS>/r $TRACK
}" | sed -e "s/$OLDLENGTH/$NEWLENGTH/g" > $OUTPUT

The full script is here, again as a Google Doc.

The core of the script revolves around a neat bit of sed (stream editor) trickery that I mentioned in my first scripting article. In this case, the core function of the script does something similar, but still hinges upon the appearance of labels in the EDL ("LABEL TIME") as a positional reference within the EDL to perform the insertion:
sed -e "s/^<\/ASSETS>/<\!-- $REM -->/g" $INPUT | sed -e "/<\!-- $REM -->/r $ASSET" | sed -e "/LABEL TIME/,/^<\/LABELS/{ /<\/LABELS>/r $TRACK
}" | sed -e "s/$OLDLENGTH/$NEWLENGTH/g"


If we break this command apart, we see that it does a few things:
1) it adds the pig as an asset (the $ASSET constant in the second sed command) to a project (the $INPUT constant listed in the first sed command)
sed -e "s/^<\/ASSETS>/<\!-- $REM -->/g" $INPUT | sed -e "/<\!-- $REM -->/r $ASSET" 

2) it adds a video track of said pig (the $TRACK constant) with this part of the command
| sed -e "/LABEL TIME/,/^<\/LABELS/{ /<\/LABELS>/r $TRACK

3) to make the new track the same length as the new track, it calculates the length of the base track and then substitutes that value for the initial length of the pig track.
| sed -e "s/$OLDLENGTH/$NEWLENGTH/g"

Now, I threw a curveball in there with that NEWLENGTH constant. This number is the current length of the video track in your input file and it is calculated via a second, slightly shorter script called "videoLength.sh".

Here is the Google Doc of that script.

Putting It All Together
To test how the script adds a track, download the following components to the same directory:
1) the jpg of the pig, save as pig2.jpg
2) the xml representing the pig, save as pigAsset.txt
3) the xml representing a new video track with effects, save as pigVideoTrack.txt
4) a test Cinelerra project, save as testProject.xml
5) the script, save as addPig.sh
6) the videoLength shell script

Don't forget to make both scripts executable:
chmod a+x addPig.sh
chmod a+x videoLength.sh, save as videoLength.sh

Script usage:
./addPig.sh [inputEDLfile] [outputEDLfile]

ex.
./addPig.sh testProject.xml trackAdded.xml

You may want to load testProject.xml into Cinelerra first to see that it only has one track. The script will create a new EDL file once it is run. Once you run the script, load your output EDL into Cinelerra. You should see the new track with the associated effects. The track should be the same length as testProject's video track.

Most likely, though, you won't see the pig, just because the pig is not in the same asset directory as the EDL specifies. Simply change pigAsset.txt to reference the pig into the proper directory, rerun the script and all should be good!

Summary
These scripts definitely can be improved upon, especially by someone who has better tools than sed to manipulate XML. But it was fun to automate a mundane task in Cinelerra. Now I don't have to manually add that watermark to my project anymore and neither do you!

the mule

Saturday, March 27, 2010

timelapse in Cinelerra

I've been playing around for the past few weeks with DSLR Remote, an iPhone app that allows you to control recent Canon or Nikon cameras remotely. DSLR Remote has an intervalometer, or timer, to allow you to take N number of photographs at T intervals. Once you take a bunch of photos, you can assemble them in Cinelerra to create a video of the change seen over time in the pictures, or timelapse.

Overview
This is my first experimentation with timelapse; specifically, timelapses of clouds and nighttime city scenes. I'm using a Canon 5D Mark II. Timelapse has been a real challenge, as the camera must be setup for proper exposure. I'm generally satisfied with the result, but I think it can be improved upon once I figure out the proper exposure settings.

An Education
I have learned some basics over the eight or so timelapses I've done:
1) don't use Automatic mode or full manual because the exposures vary quite a bit if the aperature (F Stop) or shutter speed change dramatically or conversely, don't change. Use aperature priority mode instead. Also, if the camera is in Auto mode, sometimes it will take time to change its settings. This will change the time interval between shots and make your final timelapse production jump around and jerky.

From the EXIF data in the JPEGs that I took during a morning timelapse, you can see how my shutter speed bounces around as the sun rose over a period of about an hour (FStop and ISO were locked):
[mule@ogre cinelerra]$ ./imageIdentifyFIsoShutter.sh /mnt/videos/projects/timelapse/Remote04639.jpg
exif:ExposureTime: 1/5
exif:FNumber: 11/1
exif:ISOSpeedRatings: 640
[mule@ogre cinelerra]$ ./imageIdentifyFIsoShutter.sh /mnt/videos/projects/timelapse/Remote05639.jpg
exif:ExposureTime: 1/100
exif:FNumber: 11/1
exif:ISOSpeedRatings: 640
[mule@ogre cinelerra]$ ./imageIdentifyFIsoShutter.sh /mnt/videos/projects/timelapse/Remote06239.jpg
exif:ExposureTime: 1/500
exif:FNumber: 11/1
exif:ISOSpeedRatings: 640


This can also blowout highlights and generally wash out the colors in the image, as shown in the latter half of this video:


2) shoot in aperature priority mode with auto ISO on. Auto ISO will account for variations in lighting conditions, like when a cloud passes in front of the sun.

3) make sure any lens stabilization is turned off, as this will make the frame jump around at times. This sounds counterintuitive, yes, but if the camera is on a tripod (as it should be for timelapse photography) a lens stabilizer will try to correct for movement that isn't present and will shift the frame around slightly. I figured this out after about five tries. (Yes, I am a doofus).

4) turn off automatic white balancing as it will effect the exposure from frame to frame

5) if you want to emphasize depth of field during day timelapses, make sure to get a neutral density filter. This will allow you to keep your aperature open wider, thus creating greater depth of field.

6) slower shutter speeds slightly blur movement. For example, daytime time lapse photography of clouds seem smoother with a slower shutter speed. Again, try a neutral density filter to help slow down the shutter speed. Of course, slow shutter speeds are very cool for time lapse traffic shots.

7) make sure your intervalometer is functioning properly. If it doesn't accurately time the snapshots, your final timelapse will look jerky and jump around once stitched together in Cinelerra.

Proper Interval
My camera has a limitation of 999 total shots that can be taken. In my experiments, I found that to acheive a smooth movement of clouds in my timelapses, I should take a picture every two or three seconds. That means if I want to take a picture every two seconds (30 pictures per minute) and I have 999 total shots available, my timelapse will last for a period of 33.3 minutes (999 shots / 30 pictures/minute). Doesn't seem that long, does it? If I chose an interval between shots of three seconds, my timelapse would occur over 49.95 minutes (999 shots / 20 pictures/minute). That seems a little more useful.

Timelapse in Cinelerra
Once I have my 999 images, I then stitch them together in Cinelerra at 60fps, 30fps or 15fps depending on my desired result..fast, medium or slower motion of whatever I was time lapsing. You'll need to do a bit of calculation to figure out at what duration (length) the images will be once imported into Cinelerra. That duration is set in Preferences -> Recording (screen below). I've provided those calculations below:
15 seconds = .0667
30 seconds = .0333
60 seconds = .0167

Be aware that if you import that many JPEGs, and especially if the JPEGs are very large, the import can take a while. My source files were 5616x3744 and took about 15-20 minutes to load.


Here's my acceptable timelapse..not the best..but getting there:


Going forward, the one thing I'd like to acheive is to remove or limit the slight changes in exposure that occur every once in a while so that the timelapse flows smoothly from one frame to another.

another work in progress..
the mule

Canon 5D: Best Modes for Video and Photos

Thursday, February 11, 2010

compiling Cinelerra on Fedora 12, x86-64 from source

Happily, I'm over the hurdle with my server rebuild from Fedora 10 to Fedora 12 and have successfully built Cinelerra from source on my Fedora 12, x86-64 box! Yes!

The install was generally smooth, with the exception of a minor glitch: as aac encoding is proprietary, ffmpeg does not include faac support. Doh! So, you'll need to compile and install ffmpeg with faac support from source as per these excellent instructions from Doran:
http://fozzolog.fozzilinymoo.org/tech/2009/11/recompiling-ffmpeg-for-fedora-12-to-add-faac-support.html

RPM Fusion Yo!
Note that you'll need both the free and non-free repositories from RPM Fusion enabled in yum. Don't use the ATrpms repos if you're going to compile from source. I've had strange system problems when I've used them in combination with the Fusion repos.

So here's the deal..

Summary Steps to Installing Cinelerra from Source
  1. download source code
  2. install dependencies for ffmpeg compile
  3. compile ffmpeg with faac support for fedora 12
  4. install rest of Cinelerra dependencies
  5. compile cinelerra

Detailed Steps to Installing Cinelerra from Source
1. Get the Cinelerra source code
git clone git://git.cinelerra.org/j6t/cinelerra.git my_cinelerra

2. Install dependencies for ffmpeg compile
Feel free to use the following script (don't forget to chmod a+x it!):
yum install dirac-devel faac-devel faad2-libs gsm-* imlib2-devel lame-libs* libdc1394-devel libvdpau-devel openjpeg-devel schroedinger-devel speex-devel texi2html x264-* xvidcore-* yasm

3. Compile ffmpeg with faac support

Highlights
[sodo@computer ~]$ yumdownloader --source ffmpeg

[sodo@computer ~]$ rpm -ivh ffmpeg-0.7.6-1.fc15.src.rpm

[sodo@computer ~]$ vi rpmbuild/SPECS/ffmpeg.spec
[sodo@computer ~]$ rpmbuild -ba ~/rpmbuild/SPECS/ffmpeg.spec --with faac

[sodo@computer ~]$ cd rpmbuild/RPMS/
[sodo@computer RPMS]$ cd x86_64/
[sodo@computer x86_64]$ ls -ltr
total 39164
-rw-rw-r--. 1 sodo sodo  259049 Dec 18 14:56 ffmpeg-0.7.6-1.fc15_fozz.x86_64.rpm
-rw-rw-r--. 1 sodo sodo 3138877 Dec 18 14:56 ffmpeg-libs-0.7.6-1.fc15_fozz.x86_64.rpm
-rw-rw-r--. 1 sodo sodo  166417 Dec 18 14:56 ffmpeg-devel-0.7.6-1.fc15_fozz.x86_64.rpm
-rw-rw-r--. 1 sodo sodo 9860213 Dec 18 14:56 ffmpeg-debuginfo-0.7.6-1.fc15_fozz.x86_64.rpm
[sodo@computer x86_64]$ sudo rpm -Uvh ffmpeg-libs-0.7.6-1.fc15_fozz.x86_64.rpm ffmpeg-0.7.6-1.fc15_fozz.x86_64.rpm ffmpeg-devel-0.7.6-1.fc15_fozz.x86_64.rpm ffmpeg-debuginfo-0.7.6-1.fc15_fozz.x86_64.rpm
[sudo] password for sodo: 
Preparing...                ########################################### [100%]
   1:ffmpeg-libs            ########################################### [ 25%]
   2:ffmpeg                 ########################################### [ 50%]
   3:ffmpeg-devel           ########################################### [ 75%]
   4:ffmpeg-debuginfo       ########################################### [100%]


4. Install rest of Cinelerra dependencies
Feel free to use the following script (don't forget to chmod a+x it!):
yum install gsm-devel libvorbis* libogg* libtool* libtheora* libpng* libjpeg* libtiff* esound* audiofile* libraw1394* libavc1394* freetype* fontconfig* nasm e2fsprogs* OpenEXR* fftw fftw-devel libsndfile* libiec61883* libdv* libquicktime ffmpeg xvidcore* lame lame-devel a52* faad2* x264* mjpegtools* faac* vlc*

5. Compile Cinelerra
If you used the same default directory when you downloaded the source code, cd into that directory and type:
./autogen.sh

This will build your configuration files. Next, to configure Cinelerra with default options, type:
./configure

If you want to customize your configuration, just type "./configure --help". At which point, configure will spill its guts to you about all the Secrets of Cinelerra.

Then, to compile the code, run:
make

If you have multiple processors, you can even run "make -j N" where "N" is the number of processors you have minus one.

Finally, if make was successful or you are just feeling good about yourself, go ahead and install Cinelerra:
make install

Hopefully, this post has gotten you started on your way to using Cinelerra, Linux's "50,000 watt flamethrower of multimedia of editing"

Much thanks to Jack Crossfire, our patron saint of compositing code.

the mule

Reference
Don't forget to read the manual!

Thursday, February 04, 2010

time average video effect

Time average is a neat effect. It takes a number of frames of video to average or accumulate.


:averaging
In the below video, I show averaging. Averaging lots of frames gives a very ghost-like effect. Average very few frames shows trails of whatever movement is happening. Medium settings are like you've had too much to drink.

Cinelerra time average effect from crazed mule on Vimeo

:accumulate
A second option called Accumulation is just that..stacking one frame on top of the other. If the scene in the frame is well lit, the frame will blowout..make it so bright that all detail will be lost. The detail gets lost quickly too, when just a few frames are being accumulated. Accumulate is more useful for extremely dark scenes, like making very distant stars become more visible, as in the example below. In the example, I show the original and the time averaged result:

Cinelerra time average effect: accumulate from crazed mule on Vimeo

There is another time averaging parameter called "Inclusion Or" that I have not used. It is explained in the link to the manual below as are the two options "Reprocess Frame Again" and "Disable Subtraction."

cheers,
the mule

Reference
Cinelerra User Manual

Saturday, January 30, 2010

mpeg toc maker

I got tired of having Cinelerra hang while create table of contents files for a list MPEG videos. So I wrote my own script to create the table of contents files for a list of MPEGs in a directory. Once you specify the LIST, the script plops the table of contents files in your users' .bcast directory in ~/.bcast.

I output the file name, start time, end time and elapsed time for the table of contents creation. This output looks like this:

SCRIPTSTART: 20100130_121201
FILE: mvi_0703.m2t START: 20100130_121201 END: 20100130_121204 TIME(s): 3
FILE: mvi_0705.m2t START: 20100130_121204 END: 20100130_121222 TIME(s): 18
FILE: mvi_0706.m2t START: 20100130_121222 END: 20100130_121255 TIME(s): 33
FILE: mvi_0708.m2t START: 20100130_121255 END: 20100130_121325 TIME(s): 30
FILE: mvi_0709.m2t START: 20100130_121325 END: 20100130_121341 TIME(s): 16
FILE: mvi_0710.m2t START: 20100130_121341 END: 20100130_121347 TIME(s): 6
FILE: mvi_0711.m2t START: 20100130_121347 END: 20100130_121401 TIME(s): 14
FILE: mvi_0713.m2t START: 20100130_121401 END: 20100130_121403 TIME(s): 2
FILE: mvi_0714.m2t START: 20100130_121403 END: 20100130_121415 TIME(s): 12
FILE: mvi_0715.m2t START: 20100130_121415 END: 20100130_121415 TIME(s): 0
FILE: mvi_0716.m2t START: 20100130_121416 END: 20100130_121416 TIME(s): 0
FILE: mvi_0717.m2t START: 20100130_121416 END: 20100130_121421 TIME(s): 5
FILE: mvi_0718.m2t START: 20100130_121421 END: 20100130_121442 TIME(s): 21
FILE: mvi_0719.m2t START: 20100130_121442 END: 20100130_121442 TIME(s): 0
FILE: mvi_0720.m2t START: 20100130_121442 END: 20100130_121446 TIME(s): 4
FILE: mvi_0721.m2t START: 20100130_121446 END: 20100130_121449 TIME(s): 3
FILE: mvi_0722.m2t START: 20100130_121449 END: 20100130_121454 TIME(s): 5
FILE: mvi_0724.m2t START: 20100130_121454 END: 20100130_121455 TIME(s): 1
FILE: mvi_0725.m2t START: 20100130_121455 END: 20100130_121507 TIME(s): 12
FILE: mvi_0727.m2t START: 20100130_121507 END: 20100130_121515 TIME(s): 8
FILE: mvi_0728.m2t START: 20100130_121515 END: 20100130_121531 TIME(s): 16
FILE: mvi_0730.m2t START: 20100130_121531 END: 20100130_121534 TIME(s): 3
FILE: mvi_0731.m2t START: 20100130_121534 END: 20100130_121535 TIME(s): 1
SCRIPTEND: 20100130_121535 RUNTIME(s): 213

*** Update 2010/05/28 ***
I added a little logic to the beginning of the script that checks for the presence of a single argument to the script. That argument is the name of a single file to convert. So now, you have two choices:
1) convert a list of mpeg files as specified in the LIST variable or
2) convert a single file via the command line like so:
./tocMaker.sh videoToConvert.m2t
*** end update ***

Here is the script:

#!/bin/bash
#
# tocMaker.sh
# Author: SCF
# Website: http://crazedmuleproductions.blogspot.com
#
# Purpose: This script builds the table of contents files for a list of mpeg files
#
# Input: List of mpeg files as specified in the LIST variable or a single file via command line like so:
# ./tocMaker.sh videoToConvert.m2t
#
# Output: Runs mpeg3toc and puts toc's in your users' .bcast directory
#
DEBUG=
if [ $1 ]
then
LIST=$1
else
LIST="*.m2t"
fi
echo "converting $LIST"
TOTALTIME=0
function dt {
DATE=$(date +"%Y%m%d_%H%M%S")
echo $DATE
}
function st {
SECONDS=$(date +%s)
echo $SECONDS
}
PWD=$(pwd)
DIR=$(echo $PWD | sed 's/\//_/g' | sed 's/^_//g')

SCRIPTSTART=$(dt)
printf "%13s %32s\n" "SCRIPTSTART:" $SCRIPTSTART

for FILE in $(ls -1 $LIST)
do
START=$(dt)
COUNTBEGIN=$(st)
NEWFILE=$(echo $FILE | sed 's/\./_/g')
FULLPATH="${DIR}_${NEWFILE}.toc"
ORIG_PATH="$PWD/$FILE"
if [ $DEBUG ]
then
echo "$FILE was: $FILE, is: $NEWFILE"
echo "FULLPATH is $FULLPATH"
echo "command is mpeg3toc $ORIG_PATH ~/.bcast/$FULLPATH"
fi
mpeg3toc $ORIG_PATH ~/.bcast/$FULLPATH
END=$(dt)
COUNTFINISH=$(st)
ELAPSED=$(expr $COUNTFINISH - $COUNTBEGIN)
printf "%13s %32s %11s %15s %11s %15s %11s %7d\n" "FILE:" $FILE "START:" $START "END:" $END "TIME(s):" $ELAPSED
TOTALTIME=$(expr $ELAPSED + $TOTALTIME)
done
SCRIPTEND=$(dt)
printf "%13s %32s %11s %15d\n" "SCRIPTEND:" $SCRIPTEND "RUNTIME(s):" $TOTALTIME

cheers,
the mule

Wednesday, January 27, 2010

batch render redux

As a follow up to this original post, I thought I'd give a few hints on working with the batch render function in Cinelerra. I've been using the batch render to prepare me for my new Fedora 12, x86-64 system. Specifically, I am using batch render to profile the capacity and speed of my current Fedora 10 system. After I install the new Fedora 12 system, I can then use the Fedora 10 performance baseline to tell me how much faster (or slower) the new system is in relation to the old system.

Selecting a Cinelerra Project
The first thing I did was use a short (~1 min) clip of a project that I had been working on:


I then used this project to output a short clip as the basis for the batch render:


Batch render is accessed by typing Shift-B within Cinelerra:


You can save a batch render list to XML format. This format is similar to the XML of the edit decision list (EDL) that Cinelerra stores when a project is saved. You can then load that XML to use later.

Batch Render Gotchas
I used a previous batch list to render out that short clip to about twenty different file formats. The batch render blew up a few times, so I had to get over a few obstacles:
1) the batch list I had saved months ago was out of date and the directory pointers in the XML were incorrect. I fixed the incorrect pointers by going into the vi text editor and doing a wholesale conversion with a sed construct:
:1,$ s/videos\/oldpath/videos\/newpath/g

1,$ says look for and make replacements on all lines. s means "search for.." The matching expression looks for the string "videos/oldpath" in the file and replaces it with "videos/newpath". g means "do the replacement globally"

2) my project had an improperly formatted Quicktime video track on the timeline. I kept getting Quicktime errors when the batch ran, which would crash Cinelerra. Once I removed that errant track, the batch render worked correctly.

3) once I got the batch running, my disk would fill up quickly as I was rendering to a few uncompressed formats. I deleted some very large, extraneous files and the batch was able to complete.

So you can see that you need to prepare both the base project and your system if you expect your batch render to run properly.

Command Line Batching
Once you get your batch working, another nice feature of batch rendering you can take advantage of is the ability of Cinelerra to do this at a command line. I just kicked off a batch job at the command line and see that it does work on a box with X installed. Nicely, it also give you an ETA:

[sodo@tbear ~]$ cinelerra -r /mnt/videos/cinelerra/batch/batchList.xml
/mnt/videos/cinelerra/batch/renderCompatibility.xml
Cinelerra 2.1CV (C) 2006 Heroine Virtual Ltd.
Compiled on Sat Jan 23 01:32:17 EST 2010

Cinelerra is free software, covered by the GNU General Public License,
and you are welcome to change it and/or distribute copies of it under
certain conditions. There is absolutely no warranty for Cinelerra.
Render::run: /mnt/videos/cinelerra/batch/renderCompatibility.xml
Render::render: starting render farm
[mpeg4 @ 0x7ff313d3ba00]warning: first frame is no keyframe
[mpeg4 @ 0x7ff313d3ba00]concealing 1 DC, 1 AC, 1 MV errors
12% ETA: 0:07:45


Batch Results
So my goal was to profile my current system's capacity by capturing the system's cpu and disk utilization while the files rendered. To really see what is going on though, I thought it might be nice to have a graphical representation of the render as it occurs over time. So I spent some time writing a gnuplot script to plot the system utilization as the files rendered:

A bit of explanation may be required. I captured the output of vmstat to a file. VMstat has CPU load and wait i/o (disk utilization) statistics. While capturing that output, I kicked off the batch render.

In the graphic, you can see that different types of renders have different utilization profiles. For example, the mpeg4 renders were generally lower in CPU utilization (red line), while h264 renders used a lot of CPU. Similarly, the uncompressed formats like rgb/rgba/yuv420planar stress out the disk quite a bit (green line). Please excuse the fact that the filenames aren't perfectly lined up with each file's render profile..this was my first effort at graphing render times.

It will be interesting to see how the new Fedora 12 install affects the CPU. Also, I am planning on installing a new hardware RAID set, so I expect those green lines to go to zero (hopefully)!

ciao,
the mule