Saturday, June 05, 2010

extundelete to the rescue!

So..in usual fashion, I had a minor foul up today. I was overzealous in my desire to reclaim disk space and zapped some primary source vids off of my ext4 partition. Ooops. Thankfully, I found extundelete, a program that scans ext3 and ext4 filesystem journals and recovers files from those journals:
http://extundelete.sourceforge.net/

Process
Here's what I did to recover the files.
1) In order to prevent the deleted files being overwritten, I immediately stopped whatever work I was doing and unmounted the drive that the files were on. In my case:
umount /dev/mapper/vg_ogre-lv_root

2) Well, that's my root drive. So before rebooting to my Fedora 12 Live CD, I checked that Fedora had the extundelete program in its repository. I was in luck!
[root@localhost ~]# yum install extundelete
Loaded plugins: presto, refresh-packagekit
fedora/metalink

20 kB 00:00
fedora
4.2 kB 00:00
fedora/primary_db
9.7 MB 00:10
updates/metalink
16 kB 00:00
updates
4.5 kB 00:00
updates/primary_db
4.3 MB 00:01
Setting up Install Process
Resolving Dependencies
--> Running transaction check
---> Package extundelete.i686 0:0.1.8-2.fc12 set to be updated
--> Finished Dependency Resolution

You can also compile from source at the link above.

3) Since extundelete requires you to access an unmounted filesystem, I rebooted to Fedora 12 Live CD

4) I installed extundelete from the Fedora Updates repository
Transaction Summary
Install 1 Package(s)
Upgrade 0 Package(s)

Total download size: 52 k
Is this ok [y/N]: y
Downloading Packages:
Setting up and reading Presto delta metadata
updates/prestodelta
4.4 kB 00:00
Processing delta metadata
Package(s) data still to download: 52 k
extundelete-0.1.8-2.fc12.i686.
rpm 52 kB 00:00
Running rpm_check_debug
Running Transaction Test
Finished Transaction Test
Transaction Test Succeeded
Running Transaction
Installing : extundelete-0.1.8-2.fc12.i686
1/1

Installed:
extundelete.i686 0:0.1.8-2.fc12

Complete!

5) In order to restore deleted files, you must have a partition mounted that has enough space for the recovered files. I have a second partition (/mnt/backups) that I use to backup my main root partition. So while running under the Live CD, I created a destination directory and mounted /mnt/backups:
[root@localhost /]# mkdir /mnt/backup[root@localhost /]# mount -t ext3 /dev/mapper/vg_ogre-lv_backup /mnt/backup

6) Though you can specify that extundelete undeletes individual files or all files on a filesystem, I ran extundelete with the proper command switches to undelete an entire directory of files.  Note that you should be in the directory that has plenty of space for the restore, as extundelete defaults to restoring what it finds to the present working directory:
[root@localhost backup]# extundelete /dev/mapper/vg_ogre-lv_root --restore-directory "mnt/videos/stormpigs/20100408"

WARNING: Extended attributes are not restored.

Loading group metadata ... 27025 groups loaded.


Loading journal descriptors ... 30695 descriptors loaded.


Writing output to directory RECOVERED_FILES/


Searching for recoverable inodes in directory mnt/videos/stormpigs/20100408 ...

309 recoverable inodes found.

Looking through the directory structure for deleted files ...
Restored inode 2495842 to file RECOVERED_FILES/mnt/videos/
stormpigs/20100408/20100408_2.m2t

Restored inode 2495844 to file RECOVERED_FILES/mnt/videos/
stormpigs/20100408/20100408_3.m2t

Restored inode 57147521 to file RECOVERED_FILES/mnt/videos/
stormpigs/20100408/vadd.txt

Restored inode 57147522 to file RECOVERED_FILES/mnt/videos/
stormpigs/20100408/aadd.txt

Restored inode 57147525 to file RECOVERED_FILES/mnt/videos/
stormpigs/20100408/temp.txt

Restored inode 57147528 to file RECOVERED_FILES/mnt/videos/
stormpigs/20100408/test.xml

Restored inode 57147532 to file RECOVERED_FILES/mnt/videos/
stormpigs/20100408/testLabels.sh

Success..or close enough to it
This is good..I've undeleted all but one of the files I had deleted. So, it looks like before I unmounted my root partition, the inode for "20100408_1.m2t" was overwritten. Oh well, two out of three ain't bad.

Update 2011/10/05
This works nicely with ext4 partitions as well.
*** end update ***

Anyway, this short post should give you some comfort that extundelete actually does what it is supposed to. Thanks number9652!!

Reference
http://extundelete.sourceforge.net/
http://sourceforge.net/mailarchive/forum.php?forum_name=extundelete-users

Monday, April 12, 2010

automating repetitive tasks by scripting Cinelerra, part II

This is a follow up to my earlier article:
/2010/01/automating-repetitive-tasks-by.html

Saving Time
In this entry, I discuss writing a shell script that automatically adds a second video track to your Cinelerra project. This comes in handy for projects that you do repeatedly. For example, a weekly podcast that uses a standard watermark.

For instance, I produce a monthly podcast for my band. You can see the pig watermark in the screen cap below:


In Cinelerra, the pig watermark is created by adding a second video track to my base Cinelerra project. This second video track includes a jpg stretched to the length of the first video track. Also, there is a chroma key effect applied to the pig track in order for it to be transparent against the background of the jam video.

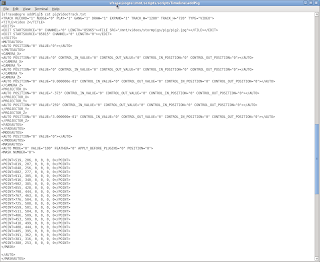
The two items, a graphic of a pig and a video track with the image of the pig and applied effects are represented by XML in the Cinelerra EDL. Remember, the Cinelerra EDL (edit decision list) is the XML file that represents all the edits that you've performed in creating your video masterpiece. It looks like this:


In this blog post, I will show you a shell script that inserts these two chunks of XML into a basic Cinelerra project file. For my script to work properly, note that the base project needs at least one video track and at least one label. I'll get into the reason for that later. The basic project file can also have audio tracks as well.

The Asset, the Asset EDL and the Video Track EDL
One asset and two sections of XML represent the video track of the pig:
1) Here is the graphic of the pig, as a Google Doc.

2) Here is the EDL of the asset (pig2.jpg):

The EDL is also available in a Google Doc.

3) Here is the EDL of the video track of the pig:

The full EDL is also available as a Google Doc.

Since I use the pig watermark on each podcast, I reuse the two chunks of XML above for each installment of my monthly podcast. So I've saved both the asset and the video track XML above from an older project to separate files (pigAsset.txt and pigVideoTrack.txt). Using the shell script, I will insert both of these files at the appropriate places in my base Cinelerra project (my latest podcast). To make life simple, my base project has only one track, the video track of the band rehearsal.

Disclaimer
You're probably saying that this seems like a lot of work and you maybe getting confused. Well..it kind of is a pain in the ass, but it will be worth it when you can whip out a shell script and automatically add your watermark to your project! But I digress..

Shell Script Fun
Here is the meat of the script:
PWD=/mnt/scripts/scriptsTimeline/addPig
ASSET=$PWD/pigAsset.txt
TRACK=$PWD/pigVideoTrack.txt
OLDLENGTH=85965
NEWLENGTH=$(videoLength.sh $INPUT)

echo "OLDLENGTH is $OLDLENGTH"
echo "NEWLENGTH is $NEWLENGTH"
echo "INPUT is $INPUT"
echo "OUTPUT is $OUTPUT"

# adds both via a pipe WORKING
sed -e "s/^<\/ASSETS>/<\!-- $REM -->/g" $INPUT | sed -e "/<\!-- $REM -->/r $ASSET" | sed -e "/LABEL TIME/,/^<\/LABELS/{ /<\/LABELS>/r $TRACK
}" | sed -e "s/$OLDLENGTH/$NEWLENGTH/g" > $OUTPUT

The full script is here, again as a Google Doc.

The core of the script revolves around a neat bit of sed (stream editor) trickery that I mentioned in my first scripting article. In this case, the core function of the script does something similar, but still hinges upon the appearance of labels in the EDL ("LABEL TIME") as a positional reference within the EDL to perform the insertion:
sed -e "s/^<\/ASSETS>/<\!-- $REM -->/g" $INPUT | sed -e "/<\!-- $REM -->/r $ASSET" | sed -e "/LABEL TIME/,/^<\/LABELS/{ /<\/LABELS>/r $TRACK
}" | sed -e "s/$OLDLENGTH/$NEWLENGTH/g"


If we break this command apart, we see that it does a few things:
1) it adds the pig as an asset (the $ASSET constant in the second sed command) to a project (the $INPUT constant listed in the first sed command)
sed -e "s/^<\/ASSETS>/<\!-- $REM -->/g" $INPUT | sed -e "/<\!-- $REM -->/r $ASSET" 

2) it adds a video track of said pig (the $TRACK constant) with this part of the command
| sed -e "/LABEL TIME/,/^<\/LABELS/{ /<\/LABELS>/r $TRACK

3) to make the new track the same length as the new track, it calculates the length of the base track and then substitutes that value for the initial length of the pig track.
| sed -e "s/$OLDLENGTH/$NEWLENGTH/g"

Now, I threw a curveball in there with that NEWLENGTH constant. This number is the current length of the video track in your input file and it is calculated via a second, slightly shorter script called "videoLength.sh".

Here is the Google Doc of that script.

Putting It All Together
To test how the script adds a track, download the following components to the same directory:
1) the jpg of the pig, save as pig2.jpg
2) the xml representing the pig, save as pigAsset.txt
3) the xml representing a new video track with effects, save as pigVideoTrack.txt
4) a test Cinelerra project, save as testProject.xml
5) the script, save as addPig.sh
6) the videoLength shell script

Don't forget to make both scripts executable:
chmod a+x addPig.sh
chmod a+x videoLength.sh, save as videoLength.sh

Script usage:
./addPig.sh [inputEDLfile] [outputEDLfile]

ex.
./addPig.sh testProject.xml trackAdded.xml

You may want to load testProject.xml into Cinelerra first to see that it only has one track. The script will create a new EDL file once it is run. Once you run the script, load your output EDL into Cinelerra. You should see the new track with the associated effects. The track should be the same length as testProject's video track.

Most likely, though, you won't see the pig, just because the pig is not in the same asset directory as the EDL specifies. Simply change pigAsset.txt to reference the pig into the proper directory, rerun the script and all should be good!

Summary
These scripts definitely can be improved upon, especially by someone who has better tools than sed to manipulate XML. But it was fun to automate a mundane task in Cinelerra. Now I don't have to manually add that watermark to my project anymore and neither do you!

the mule

Saturday, March 27, 2010

timelapse in Cinelerra

I've been playing around for the past few weeks with DSLR Remote, an iPhone app that allows you to control recent Canon or Nikon cameras remotely. DSLR Remote has an intervalometer, or timer, to allow you to take N number of photographs at T intervals. Once you take a bunch of photos, you can assemble them in Cinelerra to create a video of the change seen over time in the pictures, or timelapse.

Overview
This is my first experimentation with timelapse; specifically, timelapses of clouds and nighttime city scenes. I'm using a Canon 5D Mark II. Timelapse has been a real challenge, as the camera must be setup for proper exposure. I'm generally satisfied with the result, but I think it can be improved upon once I figure out the proper exposure settings.

An Education
I have learned some basics over the eight or so timelapses I've done:
1) don't use Automatic mode or full manual because the exposures vary quite a bit if the aperature (F Stop) or shutter speed change dramatically or conversely, don't change. Use aperature priority mode instead. Also, if the camera is in Auto mode, sometimes it will take time to change its settings. This will change the time interval between shots and make your final timelapse production jump around and jerky.

From the EXIF data in the JPEGs that I took during a morning timelapse, you can see how my shutter speed bounces around as the sun rose over a period of about an hour (FStop and ISO were locked):
[mule@ogre cinelerra]$ ./imageIdentifyFIsoShutter.sh /mnt/videos/projects/timelapse/Remote04639.jpg
exif:ExposureTime: 1/5
exif:FNumber: 11/1
exif:ISOSpeedRatings: 640
[mule@ogre cinelerra]$ ./imageIdentifyFIsoShutter.sh /mnt/videos/projects/timelapse/Remote05639.jpg
exif:ExposureTime: 1/100
exif:FNumber: 11/1
exif:ISOSpeedRatings: 640
[mule@ogre cinelerra]$ ./imageIdentifyFIsoShutter.sh /mnt/videos/projects/timelapse/Remote06239.jpg
exif:ExposureTime: 1/500
exif:FNumber: 11/1
exif:ISOSpeedRatings: 640


This can also blowout highlights and generally wash out the colors in the image, as shown in the latter half of this video:


2) shoot in aperature priority mode with auto ISO on. Auto ISO will account for variations in lighting conditions, like when a cloud passes in front of the sun.

3) make sure any lens stabilization is turned off, as this will make the frame jump around at times. This sounds counterintuitive, yes, but if the camera is on a tripod (as it should be for timelapse photography) a lens stabilizer will try to correct for movement that isn't present and will shift the frame around slightly. I figured this out after about five tries. (Yes, I am a doofus).

4) turn off automatic white balancing as it will effect the exposure from frame to frame

5) if you want to emphasize depth of field during day timelapses, make sure to get a neutral density filter. This will allow you to keep your aperature open wider, thus creating greater depth of field.

6) slower shutter speeds slightly blur movement. For example, daytime time lapse photography of clouds seem smoother with a slower shutter speed. Again, try a neutral density filter to help slow down the shutter speed. Of course, slow shutter speeds are very cool for time lapse traffic shots.

7) make sure your intervalometer is functioning properly. If it doesn't accurately time the snapshots, your final timelapse will look jerky and jump around once stitched together in Cinelerra.

Proper Interval
My camera has a limitation of 999 total shots that can be taken. In my experiments, I found that to acheive a smooth movement of clouds in my timelapses, I should take a picture every two or three seconds. That means if I want to take a picture every two seconds (30 pictures per minute) and I have 999 total shots available, my timelapse will last for a period of 33.3 minutes (999 shots / 30 pictures/minute). Doesn't seem that long, does it? If I chose an interval between shots of three seconds, my timelapse would occur over 49.95 minutes (999 shots / 20 pictures/minute). That seems a little more useful.

Timelapse in Cinelerra
Once I have my 999 images, I then stitch them together in Cinelerra at 60fps, 30fps or 15fps depending on my desired result..fast, medium or slower motion of whatever I was time lapsing. You'll need to do a bit of calculation to figure out at what duration (length) the images will be once imported into Cinelerra. That duration is set in Preferences -> Recording (screen below). I've provided those calculations below:
15 seconds = .0667
30 seconds = .0333
60 seconds = .0167

Be aware that if you import that many JPEGs, and especially if the JPEGs are very large, the import can take a while. My source files were 5616x3744 and took about 15-20 minutes to load.


Here's my acceptable timelapse..not the best..but getting there:


Going forward, the one thing I'd like to acheive is to remove or limit the slight changes in exposure that occur every once in a while so that the timelapse flows smoothly from one frame to another.

another work in progress..
the mule

Canon 5D: Best Modes for Video and Photos

Sunday, February 21, 2010

fsarchiver, good backup for ext4 partitions

Since I had lost my root partition the other day (!), I needed a decent method to backup my new ext4 partitions. Since partimage does not currently support ext4, I found fsarchiver:
http://www.fsarchiver.org/

Overview
I've partitioned my new 4.5TB drives this way:
/boot
/root 3.7TB
/backup 800GB


I formatted the backup filesystem as ext3. This way, I can simply boot with a Fedora Live CD, mount the backup partition and backup my boot and root partitions to the backup. Of course, I'll need to roll that backup off to another storage media. But this strategy helps when I make major updates to my system because I can easily rollback to an earlier version that is stored locally.

Most importantly, restore works!

Detail
Here's what I did the other day to get 'er going.

First, I booted to my Fedora Live CD. It didn't have fsarchiver installed by default, so I did so. You need to become superuser to do this:
[liveuser@localhost ~]$ su
[root@localhost liveuser]# yum install fsarchiver
Loaded plugins: presto, refresh-packagekit
Setting up Install Process
Resolving Dependencies
--> Running transaction check
---> Package fsarchiver.i686 0:0.6.7-1.fc12 set to be updated
--> Finished Dependency Resolution

Dependencies Resolved

=============================================================================================================================================================
Package Arch Version Repository Size
=============================================================================================================================================================
Installing:
fsarchiver i686 0.6.7-1.fc12 updates 93 k

Transaction Summary
=============================================================================================================================================================
Install 1 Package(s)
Upgrade 0 Package(s)

Total download size: 93 k
Is this ok [y/N]: y
Downloading Packages:
Transaction Test Succeeded
Installing : fsarchiver-0.6.7-1.fc12.i686 1/1
Installed:
fsarchiver.i686 0:0.6.7-1.fc12

Complete!


I created my backup directory and mounted it:
[root@localhost liveuser]# mkdir /mnt/backup
[root@localhost liveuser]# mount -t ext3 /dev/mapper/vg_ogre-lv_backup /mnt/backup
[root@localhost liveuser]# ls /mnt/backup
lost+found test.txt


Finally, I ran fsarchiver to do the backup and took advantage of its multithreaded capability:
[root@localhost liveuser]# fsarchiver -j7 -o savefs /mnt/backup/lv_root_backup.fsa /dev/mapper/vg_ogre-lv_root
Statistics for filesystem 0
* files successfully processed:....regfiles=306990, directories=31024, symlinks=16561, hardlinks=4157, specials=28
* files with errors:...............regfiles=0, directories=0, symlinks=0, hardlinks=0, specials=0


You could concatenate these steps into a script:
[mule@ogre ~]$ cat systemBackup.sh
su -
yum install fsarchiver
mkdir /mnt/backup
mount -t ext3 /dev/mapper/vg-ogre/lv_backup /mnt/backup
fsarchiver -j7 -o savefs /mnt/backup/lv_root_backup.fsa /dev/mapper/vg_ogre-lv_root


Voila! In seven hours, I backed up approximately 450GB of data:
[root@localhost liveuser]$ ll /mnt/backup
total 459289180
drwx------. 2 root root 16384 2010-02-10 20:09 lost+found
-rw-r--r--. 1 root root 480252970629 2010-07-21 07:34 lv_root_backup.fsa


Update:
When my RAID set was not being checked, an fsarchive of about 760GB took 3.5 hours. Not bad!
***end update***

Restore
Restore works in a similar way. Since fsarchiver allows you to backup multiple filesystems within one archive, you need to specify which filesystem is getting restored.

In the example below, the "id=0" specifies the index (starting at 0) of the filesystem that is in the archive.  The filesystem to be restored cannot be mounted:
fsarchiver restfs /mnt/backup/lv_root_backup.fsa id=0,dest=/dev/mapper/vg_ogre-lv_root


If you had multiple file  systems stored in the archive "lv_root_backup.fsa", then the id number would increment; eg, "id=1" for the second filesystem stored in the archive.

"dest" is the destination filesystem which is getting restored, in this case "/dev/mapper/vg_ogre-lv_root"


Password Protection for Archives
You can also specify a password to password protect your archive.  On backup and restore, the password switch looks the same:
sudo fsarchiver restfs backup_vg_ogre-lv_root.fsa id=0,dest=/dev/sdb1 -c [password]

Worked for me on many occasions.
the mule

References
http://www.fsarchiver.org/QuickStart

Thursday, February 11, 2010

compiling Cinelerra on Fedora 12, x86-64 from source

Happily, I'm over the hurdle with my server rebuild from Fedora 10 to Fedora 12 and have successfully built Cinelerra from source on my Fedora 12, x86-64 box! Yes!

The install was generally smooth, with the exception of a minor glitch: as aac encoding is proprietary, ffmpeg does not include faac support. Doh! So, you'll need to compile and install ffmpeg with faac support from source as per these excellent instructions from Doran:
http://fozzolog.fozzilinymoo.org/tech/2009/11/recompiling-ffmpeg-for-fedora-12-to-add-faac-support.html

RPM Fusion Yo!
Note that you'll need both the free and non-free repositories from RPM Fusion enabled in yum. Don't use the ATrpms repos if you're going to compile from source. I've had strange system problems when I've used them in combination with the Fusion repos.

So here's the deal..

Summary Steps to Installing Cinelerra from Source
  1. download source code
  2. install dependencies for ffmpeg compile
  3. compile ffmpeg with faac support for fedora 12
  4. install rest of Cinelerra dependencies
  5. compile cinelerra

Detailed Steps to Installing Cinelerra from Source
1. Get the Cinelerra source code
git clone git://git.cinelerra.org/j6t/cinelerra.git my_cinelerra

2. Install dependencies for ffmpeg compile
Feel free to use the following script (don't forget to chmod a+x it!):
yum install dirac-devel faac-devel faad2-libs gsm-* imlib2-devel lame-libs* libdc1394-devel libvdpau-devel openjpeg-devel schroedinger-devel speex-devel texi2html x264-* xvidcore-* yasm

3. Compile ffmpeg with faac support

Highlights
[sodo@computer ~]$ yumdownloader --source ffmpeg

[sodo@computer ~]$ rpm -ivh ffmpeg-0.7.6-1.fc15.src.rpm

[sodo@computer ~]$ vi rpmbuild/SPECS/ffmpeg.spec
[sodo@computer ~]$ rpmbuild -ba ~/rpmbuild/SPECS/ffmpeg.spec --with faac

[sodo@computer ~]$ cd rpmbuild/RPMS/
[sodo@computer RPMS]$ cd x86_64/
[sodo@computer x86_64]$ ls -ltr
total 39164
-rw-rw-r--. 1 sodo sodo  259049 Dec 18 14:56 ffmpeg-0.7.6-1.fc15_fozz.x86_64.rpm
-rw-rw-r--. 1 sodo sodo 3138877 Dec 18 14:56 ffmpeg-libs-0.7.6-1.fc15_fozz.x86_64.rpm
-rw-rw-r--. 1 sodo sodo  166417 Dec 18 14:56 ffmpeg-devel-0.7.6-1.fc15_fozz.x86_64.rpm
-rw-rw-r--. 1 sodo sodo 9860213 Dec 18 14:56 ffmpeg-debuginfo-0.7.6-1.fc15_fozz.x86_64.rpm
[sodo@computer x86_64]$ sudo rpm -Uvh ffmpeg-libs-0.7.6-1.fc15_fozz.x86_64.rpm ffmpeg-0.7.6-1.fc15_fozz.x86_64.rpm ffmpeg-devel-0.7.6-1.fc15_fozz.x86_64.rpm ffmpeg-debuginfo-0.7.6-1.fc15_fozz.x86_64.rpm
[sudo] password for sodo: 
Preparing...                ########################################### [100%]
   1:ffmpeg-libs            ########################################### [ 25%]
   2:ffmpeg                 ########################################### [ 50%]
   3:ffmpeg-devel           ########################################### [ 75%]
   4:ffmpeg-debuginfo       ########################################### [100%]


4. Install rest of Cinelerra dependencies
Feel free to use the following script (don't forget to chmod a+x it!):
yum install gsm-devel libvorbis* libogg* libtool* libtheora* libpng* libjpeg* libtiff* esound* audiofile* libraw1394* libavc1394* freetype* fontconfig* nasm e2fsprogs* OpenEXR* fftw fftw-devel libsndfile* libiec61883* libdv* libquicktime ffmpeg xvidcore* lame lame-devel a52* faad2* x264* mjpegtools* faac* vlc*

5. Compile Cinelerra
If you used the same default directory when you downloaded the source code, cd into that directory and type:
./autogen.sh

This will build your configuration files. Next, to configure Cinelerra with default options, type:
./configure

If you want to customize your configuration, just type "./configure --help". At which point, configure will spill its guts to you about all the Secrets of Cinelerra.

Then, to compile the code, run:
make

If you have multiple processors, you can even run "make -j N" where "N" is the number of processors you have minus one.

Finally, if make was successful or you are just feeling good about yourself, go ahead and install Cinelerra:
make install

Hopefully, this post has gotten you started on your way to using Cinelerra, Linux's "50,000 watt flamethrower of multimedia of editing"

Much thanks to Jack Crossfire, our patron saint of compositing code.

the mule

Reference
Don't forget to read the manual!

Saturday, February 06, 2010

lost root partition..oops.

I was running some disk performance statistics on the new Fedora 12 64-bit yesterday according to the very good benchmarking article on 3ware's site:

Benchmarking
I was benchmarking the write performance of my RAID set when it seemed to stall out. The process I was running was writing a bunch of zeros to a 20 gigabyte file. I believe the stall was due to the fact that my RAID controller card's battery was disconnected; hence, write-cacheing was disabled.

I let the process try to finish for four hours. I figured it should have finished writing that 20GB file by that time. However, the fact that the system was still slow to non-responsive indicated that activity was still taking place. But, being an impetuous fool, I was anxious to get working on some video and also thought it might be an interesting test of the resilience of the ext4 filesystem if I just shut the system down. So I as a soft reboot did not do the trick, I hard powered the box off.

Sleeping the Sleep of the Dead
In retrospect, I should have let the box finish whatever it was doing, because as you may have guessed it, the box didn't come back up. Here was the first indication from the kernel messages:
Boot has failed..sleeping forever

And in the dmesg output:
can't mount root filesystem
can't access tty job control turned off

Woops. Dracut did find my volume group:
dracut: 2 logical voumes in "vg_ogre" now active

Something was wrong with the root filesystem mount:
mount: you must specify the filesystem type

Just in case, I rebooted with the following kernel parameters in grub to see more debugging and to drop me to an emergency shell to see if I could debug the problem:
kernel .. debug rdshell

What Up, ext4?
Oh boy. So, ext4 is not as resilient as I believed. I thought the best course of action would be to load up Fedora Live, and look at the disk stats. Since fdisk does not work with GPT partitions, I used parted and thought that I'd use e2fsck to fix any bad blocks. After booting the Live CD, here's what I found:

The swap drive seemed in tact (oh, great):
[liveuser@localhost ~]$ dmesg | grep vg
vgaarb: device added: PCI:0000:07:00.0,decodes=io+mem,owns=io+mem,locks=none
vgaarb: loaded
Adding 12369912k swap on /dev/mapper/vg_ogre-lv_swap. Priority:-1 extents:1 across:12369912k


I thought I'd try to manually mount my / partition. I had to become superuser in order to do this:
[liveuser@localhost ~]$ su
[root@localhost liveuser]# mkdir /mnt/root
[root@localhost liveuser]# mount -t ext4 /dev/mapper/vg_ogre-lv_root /mnt/root
mount: wrong fs type, bad option, bad superblock on /dev/mapper/vg_ogre-lv_root,
missing codepage or helper program, or other error
In some cases useful info is found in syslog - try
dmesg | tail or so


Dmesg tells me what I already know:
[root@localhost liveuser]# dmesg | tail
[drm] nouveau 0000:07:00.0: 0x00409910: 0x3fbf3fdb
[drm] nouveau 0000:07:00.0: 0x00409e08: 0x0002dea8
[drm] nouveau 0000:07:00.0: 0x00409e0c: 0x00000000
[drm] nouveau 0000:07:00.0: 0x00409e24: 0x0a21026f
EXT4-fs (dm-2): VFS: Can't find ext4 filesystem


I just want to see what fdisk reads about my hardware RAID5 array (3ware 9650SE):
[root@localhost liveuser]# fdisk -l /dev/sda

WARNING: GPT (GUID Partition Table) detected on '/dev/sda'! The util fdisk doesn't support GPT. Use GNU Parted.

WARNING: The size of this disk is 4.5 TB (4499967049728 bytes).
DOS partition table format can not be used on drives for volumes
larger than (2199023255040 bytes) for 512-byte sectors. Use parted(1) and GUID
partition table format (GPT).


Disk /dev/sda: 4500.0 GB, 4499967049728 bytes
255 heads, 63 sectors/track, 547089 cylinders
Units = cylinders of 16065 * 512 = 8225280 bytes
Disk identifier: 0x000f0844

Device Boot Start End Blocks Id System
/dev/sda1 1 267350 2147483647+ ee GPT


What does parted see about /dev/sda?
[root@localhost liveuser]# parted /dev/sda print
Model: AMCC 9650SE-4LP DISK (scsi)
Disk /dev/sda: 4500GB
Sector size (logical/physical): 512B/512B
Partition Table: gpt

Number Start End Size File system Name Flags
1 17.9kB 210MB 210MB ext4 boot
2 210MB 4500GB 4500GB lvm


At least the partition is there. But it looks like parted does not have support for checking ext4 filesystems yet:
[root@localhost liveuser]# parted /dev/sda
GNU Parted 1.9.0
Using /dev/sda
Welcome to GNU Parted! Type 'help' to view a list of commands.
(parted) check 1
No Implementation: Support for opening ext4 file systems is not implemented yet.
(parted) check 2
Error: Could not detect file system.
(parted) quit


e2fsck bound!
Let me run e2fsck (which does have support for ext4 filesystems) and see if I can fix the problem:
[root@localhost liveuser]# e2fsck
Usage: e2fsck [-panyrcdfvtDFV] [-b superblock] [-B blocksize]
[-I inode_buffer_blocks] [-P process_inode_size]
[-l|-L bad_blocks_file] [-C fd] [-j external_journal]
[-E extended-options] device

Emergency help:
-p Automatic repair (no questions)
-n Make no changes to the filesystem
-y Assume "yes" to all questions
-c Check for bad blocks and add them to the badblock list
-f Force checking even if filesystem is marked clean
-v Be verbose
-b superblock Use alternative superblock
-B blocksize Force blocksize when looking for superblock
-j external_journal Set location of the external journal
-l bad_blocks_file Add to badblocks list
-L bad_blocks_file Set badblocks list


My skills at e2fsck are pretty basic. I use the -n option to make no changes while I review what e2fsck finds out about the array:
[root@localhost liveuser]# e2fsck -n /dev/mapper/vg_ogre-lv_root
e2fsck 1.41.9 (22-Aug-2009)
e2fsck: Superblock invalid, trying backup blocks...
Superblock has an invalid journal (inode 8).
Clear? no

e2fsck: Illegal inode number while checking ext3 journal for /dev/mapper/vg_ogre-lv_root


Invalid journal..oops.
[root@localhost liveuser]# e2fsck -v /dev/mapper/vg_ogre-lv_root
e2fsck 1.41.9 (22-Aug-2009)
e2fsck: Superblock invalid, trying backup blocks...
Superblock has an invalid journal (inode 8).
Clear
?y

I had thought that ext4 gave us the safety of a journalled filesystem (like ext3) with increased performance. You would have thought it could have recovered from being shutdown while writing a bunch of zeros to a 20 gigabyte file.

And then of course, hundreds to thousands of these various errors:
Group descriptor 32923 checksum is invalid. FIXED.

Entry 'e61abf8156cc476151baa07d67337cae-le64.cache-3' in ??? (57347) has deleted/unused inode 212. Clear? yes

Unconnected directory inode 98305 (...)
Connect to /lost+found? yes

Free blocks count wrong for group #138 (32768, counted=557).
Fix? yes

Free inodes count wrong for group #308 (8192, counted=8186).
Fix? yes

Directories count wrong for group #308 (0, counted=6).
Fix? yes


Finally..at the bottom of the list of errors:
Recreate journal? yes

Creating journal (32768 blocks): yyyyyyy Done.

*** journal has been re-created - filesystem is now ext3 again ***

/dev/mapper/vg_ogre-lv_root: ***** FILE SYSTEM WAS MODIFIED *****

327475 inodes used (0.12%)
585 non-contiguous files (0.2%)
130 non-contiguous directories (0.0%)
# of inodes with ind/dind/tind blocks: 0/0/0
Extent depth histogram: 310327/414/1
239381919 blocks used (21.85%)
0 bad blocks
42 large files

283167 regular files
27385 directories
0 character device files
0 block device files
0 fifos
3953 links
16849 symbolic links (16659 fast symbolic links)
63 sockets
--------
331417 files
[root@localhost liveuser


Result?
So let's see if I have files in tact after that 18 hour experience..
[root@localhost liveuser]# mount -t ext4 /dev/mapper/vg_ogre-lv_root /mnt/root/
[root@localhost liveuser]# ls /mnt/root
lost+found
[root@localhost liveuser]# ls /mnt/root
lost+found
[root@localhost liveuser]# ls /mnt/root/lost+found/

*348489 *723483 324843 238390

Ah..that would be a "no." Time to reinstall F12. Ugh. Lesson learned. But I need to know why I couldn't recover a journal. Maybe I did not look in the right place. I need to understand journalling better.

Things I Learned Along the Way
Some boot info from the Live CD
[root@localhost liveuser]# grep EFI_ /boot/config-2.6.31.5-127.fc12.i686
CONFIG_EFI_VARS=y
CONFIG_EFI_PARTITION=y


You can force a filesystem check upon the next reboot with this command:
shutdown -rF now

You can run verbose debug messages and drop to an emergency shell by placing these commands on the kernel line in grub:
kernel /vmlinuz-2.6.31.12-174.2.3.fc12.x86_64 ro root=/dev/mapper/vg_ogre-lv_root debug rdshell

References

Thursday, February 04, 2010

time average video effect

Time average is a neat effect. It takes a number of frames of video to average or accumulate.


:averaging
In the below video, I show averaging. Averaging lots of frames gives a very ghost-like effect. Average very few frames shows trails of whatever movement is happening. Medium settings are like you've had too much to drink.

Cinelerra time average effect from crazed mule on Vimeo

:accumulate
A second option called Accumulation is just that..stacking one frame on top of the other. If the scene in the frame is well lit, the frame will blowout..make it so bright that all detail will be lost. The detail gets lost quickly too, when just a few frames are being accumulated. Accumulate is more useful for extremely dark scenes, like making very distant stars become more visible, as in the example below. In the example, I show the original and the time averaged result:

Cinelerra time average effect: accumulate from crazed mule on Vimeo

There is another time averaging parameter called "Inclusion Or" that I have not used. It is explained in the link to the manual below as are the two options "Reprocess Frame Again" and "Disable Subtraction."

cheers,
the mule

Reference
Cinelerra User Manual

Saturday, January 30, 2010

mpeg toc maker

I got tired of having Cinelerra hang while create table of contents files for a list MPEG videos. So I wrote my own script to create the table of contents files for a list of MPEGs in a directory. Once you specify the LIST, the script plops the table of contents files in your users' .bcast directory in ~/.bcast.

I output the file name, start time, end time and elapsed time for the table of contents creation. This output looks like this:

SCRIPTSTART: 20100130_121201
FILE: mvi_0703.m2t START: 20100130_121201 END: 20100130_121204 TIME(s): 3
FILE: mvi_0705.m2t START: 20100130_121204 END: 20100130_121222 TIME(s): 18
FILE: mvi_0706.m2t START: 20100130_121222 END: 20100130_121255 TIME(s): 33
FILE: mvi_0708.m2t START: 20100130_121255 END: 20100130_121325 TIME(s): 30
FILE: mvi_0709.m2t START: 20100130_121325 END: 20100130_121341 TIME(s): 16
FILE: mvi_0710.m2t START: 20100130_121341 END: 20100130_121347 TIME(s): 6
FILE: mvi_0711.m2t START: 20100130_121347 END: 20100130_121401 TIME(s): 14
FILE: mvi_0713.m2t START: 20100130_121401 END: 20100130_121403 TIME(s): 2
FILE: mvi_0714.m2t START: 20100130_121403 END: 20100130_121415 TIME(s): 12
FILE: mvi_0715.m2t START: 20100130_121415 END: 20100130_121415 TIME(s): 0
FILE: mvi_0716.m2t START: 20100130_121416 END: 20100130_121416 TIME(s): 0
FILE: mvi_0717.m2t START: 20100130_121416 END: 20100130_121421 TIME(s): 5
FILE: mvi_0718.m2t START: 20100130_121421 END: 20100130_121442 TIME(s): 21
FILE: mvi_0719.m2t START: 20100130_121442 END: 20100130_121442 TIME(s): 0
FILE: mvi_0720.m2t START: 20100130_121442 END: 20100130_121446 TIME(s): 4
FILE: mvi_0721.m2t START: 20100130_121446 END: 20100130_121449 TIME(s): 3
FILE: mvi_0722.m2t START: 20100130_121449 END: 20100130_121454 TIME(s): 5
FILE: mvi_0724.m2t START: 20100130_121454 END: 20100130_121455 TIME(s): 1
FILE: mvi_0725.m2t START: 20100130_121455 END: 20100130_121507 TIME(s): 12
FILE: mvi_0727.m2t START: 20100130_121507 END: 20100130_121515 TIME(s): 8
FILE: mvi_0728.m2t START: 20100130_121515 END: 20100130_121531 TIME(s): 16
FILE: mvi_0730.m2t START: 20100130_121531 END: 20100130_121534 TIME(s): 3
FILE: mvi_0731.m2t START: 20100130_121534 END: 20100130_121535 TIME(s): 1
SCRIPTEND: 20100130_121535 RUNTIME(s): 213

*** Update 2010/05/28 ***
I added a little logic to the beginning of the script that checks for the presence of a single argument to the script. That argument is the name of a single file to convert. So now, you have two choices:
1) convert a list of mpeg files as specified in the LIST variable or
2) convert a single file via the command line like so:
./tocMaker.sh videoToConvert.m2t
*** end update ***

Here is the script:

#!/bin/bash
#
# tocMaker.sh
# Author: SCF
# Website: http://crazedmuleproductions.blogspot.com
#
# Purpose: This script builds the table of contents files for a list of mpeg files
#
# Input: List of mpeg files as specified in the LIST variable or a single file via command line like so:
# ./tocMaker.sh videoToConvert.m2t
#
# Output: Runs mpeg3toc and puts toc's in your users' .bcast directory
#
DEBUG=
if [ $1 ]
then
LIST=$1
else
LIST="*.m2t"
fi
echo "converting $LIST"
TOTALTIME=0
function dt {
DATE=$(date +"%Y%m%d_%H%M%S")
echo $DATE
}
function st {
SECONDS=$(date +%s)
echo $SECONDS
}
PWD=$(pwd)
DIR=$(echo $PWD | sed 's/\//_/g' | sed 's/^_//g')

SCRIPTSTART=$(dt)
printf "%13s %32s\n" "SCRIPTSTART:" $SCRIPTSTART

for FILE in $(ls -1 $LIST)
do
START=$(dt)
COUNTBEGIN=$(st)
NEWFILE=$(echo $FILE | sed 's/\./_/g')
FULLPATH="${DIR}_${NEWFILE}.toc"
ORIG_PATH="$PWD/$FILE"
if [ $DEBUG ]
then
echo "$FILE was: $FILE, is: $NEWFILE"
echo "FULLPATH is $FULLPATH"
echo "command is mpeg3toc $ORIG_PATH ~/.bcast/$FULLPATH"
fi
mpeg3toc $ORIG_PATH ~/.bcast/$FULLPATH
END=$(dt)
COUNTFINISH=$(st)
ELAPSED=$(expr $COUNTFINISH - $COUNTBEGIN)
printf "%13s %32s %11s %15s %11s %15s %11s %7d\n" "FILE:" $FILE "START:" $START "END:" $END "TIME(s):" $ELAPSED
TOTALTIME=$(expr $ELAPSED + $TOTALTIME)
done
SCRIPTEND=$(dt)
printf "%13s %32s %11s %15d\n" "SCRIPTEND:" $SCRIPTEND "RUNTIME(s):" $TOTALTIME

cheers,
the mule

Wednesday, January 27, 2010

batch render redux

As a follow up to this original post, I thought I'd give a few hints on working with the batch render function in Cinelerra. I've been using the batch render to prepare me for my new Fedora 12, x86-64 system. Specifically, I am using batch render to profile the capacity and speed of my current Fedora 10 system. After I install the new Fedora 12 system, I can then use the Fedora 10 performance baseline to tell me how much faster (or slower) the new system is in relation to the old system.

Selecting a Cinelerra Project
The first thing I did was use a short (~1 min) clip of a project that I had been working on:


I then used this project to output a short clip as the basis for the batch render:


Batch render is accessed by typing Shift-B within Cinelerra:


You can save a batch render list to XML format. This format is similar to the XML of the edit decision list (EDL) that Cinelerra stores when a project is saved. You can then load that XML to use later.

Batch Render Gotchas
I used a previous batch list to render out that short clip to about twenty different file formats. The batch render blew up a few times, so I had to get over a few obstacles:
1) the batch list I had saved months ago was out of date and the directory pointers in the XML were incorrect. I fixed the incorrect pointers by going into the vi text editor and doing a wholesale conversion with a sed construct:
:1,$ s/videos\/oldpath/videos\/newpath/g

1,$ says look for and make replacements on all lines. s means "search for.." The matching expression looks for the string "videos/oldpath" in the file and replaces it with "videos/newpath". g means "do the replacement globally"

2) my project had an improperly formatted Quicktime video track on the timeline. I kept getting Quicktime errors when the batch ran, which would crash Cinelerra. Once I removed that errant track, the batch render worked correctly.

3) once I got the batch running, my disk would fill up quickly as I was rendering to a few uncompressed formats. I deleted some very large, extraneous files and the batch was able to complete.

So you can see that you need to prepare both the base project and your system if you expect your batch render to run properly.

Command Line Batching
Once you get your batch working, another nice feature of batch rendering you can take advantage of is the ability of Cinelerra to do this at a command line. I just kicked off a batch job at the command line and see that it does work on a box with X installed. Nicely, it also give you an ETA:

[sodo@tbear ~]$ cinelerra -r /mnt/videos/cinelerra/batch/batchList.xml
/mnt/videos/cinelerra/batch/renderCompatibility.xml
Cinelerra 2.1CV (C) 2006 Heroine Virtual Ltd.
Compiled on Sat Jan 23 01:32:17 EST 2010

Cinelerra is free software, covered by the GNU General Public License,
and you are welcome to change it and/or distribute copies of it under
certain conditions. There is absolutely no warranty for Cinelerra.
Render::run: /mnt/videos/cinelerra/batch/renderCompatibility.xml
Render::render: starting render farm
[mpeg4 @ 0x7ff313d3ba00]warning: first frame is no keyframe
[mpeg4 @ 0x7ff313d3ba00]concealing 1 DC, 1 AC, 1 MV errors
12% ETA: 0:07:45


Batch Results
So my goal was to profile my current system's capacity by capturing the system's cpu and disk utilization while the files rendered. To really see what is going on though, I thought it might be nice to have a graphical representation of the render as it occurs over time. So I spent some time writing a gnuplot script to plot the system utilization as the files rendered:

A bit of explanation may be required. I captured the output of vmstat to a file. VMstat has CPU load and wait i/o (disk utilization) statistics. While capturing that output, I kicked off the batch render.

In the graphic, you can see that different types of renders have different utilization profiles. For example, the mpeg4 renders were generally lower in CPU utilization (red line), while h264 renders used a lot of CPU. Similarly, the uncompressed formats like rgb/rgba/yuv420planar stress out the disk quite a bit (green line). Please excuse the fact that the filenames aren't perfectly lined up with each file's render profile..this was my first effort at graphing render times.

It will be interesting to see how the new Fedora 12 install affects the CPU. Also, I am planning on installing a new hardware RAID set, so I expect those green lines to go to zero (hopefully)!

ciao,
the mule

Sunday, January 24, 2010

compile time performance improved!

I was compiling Cinelerra today and noticed that CPU usage was very low during the compile..around 10-15% utilized. I have a dual CPU, quad core box. This makes for a total of eight processors. So with all those CPUs, I figured there must be a way to make compiling faster.

Actually, this low CPU use during compiles was something I had noticed the first time I installed Cinelerra. Ashamedly, I've forgotten to investigate this issue in the two years that I've had the box. So today I googled for "make compiler see multiple CPUs" and found the -j switch to "make" the program that does the compiling:
http://blogs.koolwal.net/2009/04/20/tip-compile-your-programs-fasters-with-multiple-processor-machines/

This article also mentions the CONCURRENCY_LEVEL environment variable, but that variable did not work for my box, a Dell SC1430. So I used the -j switch to make instead:
[mule@ogre my_cinelerra]$ make -j7
(CDPATH="${ZSH_VERSION+.}:" && cd . && /bin/sh /home/sfrase/my_cinelerra/missing --run autoheader)
rm -f stamp-h1


Here are my results.

the time it took to compile Cinelerra normally, without -j:
3min 45s
the time it took to compile Cinelerra with the -j8 (for eight cores):
1min 16s

Holy crap! That's a 300% speed improvement!

Glad I finally researched this.
scott

ps - one other note: 7z is a multithreaded version of tar. On Fedora, use 7za
Installing : p7zip-4.65-2.fc12.x86_64
7za - A file archiver with highest compression ratio

SYNOPSIS
7za [adeltux] [-] [SWITCH]


Related Posts
http://crazedmuleproductions.blogspot.com/2007/10/multithreading-in-ffmpeg-and-mpstat.html

Fedora 12, x86-64 upgrade

The time has come again..sytem upgrade. Ugh.

From Fedora 10 x86-64 to Fedora 12 x86-64
I say "ugh", but I truly am excited as Fedora 12 does have some nice performance improvements (ext4, kernel modesetting, faster boot, rpm) that they've packaged since the Fedora 10 system I'm working with now:
http://fedoraproject.org/wiki/Releases/11/FeatureList
http://fedoraproject.org/wiki/Releases/12/FeatureList

To be clear, I don't do upgrades. I will tar up my /home directory to USB, install the new OS from scratch and then blast my /home directory onto the clean new OS and RAID array.

Thinking Hard
I've spent quite a bit of time planning this upgrade. One of the big things I am doing is to profile the performance of my system before and after the OS and hardware upgrades. Of course, I won't be able to determine whether or not the performance gain is coming from the OS or the new RAID array, but at the end of the day, I simply want to be able to say "my system is now X% faster."

I will be looking at the performance of the system from the OS, Cinelerra and encoder perspectives.

Learning about Fedora 12
http://fedoraproject.org/wiki/Common_F12_bugs
http://www.scribd.com/doc/24513176/Fedora-12-Installation-Guide
Changes_in_Fedora_for_Desktop_Users

Hardware changes going in
New RAID configuration:
3WARE Pci-e 9650SE RAID card with Battery Backup
four Western Digital 1.5 TB Green SATA 32MB Cache Hard Drive

Virtual Machine Testbed
One of the things that has helped me in the process is using VMware Server to test out Fedora 12. I've caught a couple things right off the bat: as it is a proprietary format, FAAC is not installed with FFmpeg by default. I was able to resolve this through Doran's excellent post here:
http://fozzolog.fozzilinymoo.org/tech/2009/11/recompiling-ffmpeg-for-fedora-12-to-add-faac-support.html

Also, H264 encoder magic has changed a bit. Other than that, my output testing to various formats (MPEG-PS, HDV, DVD, iPod/iPhone) has worked very well.

General prep work
work out bugs with Fedora 12 virtual machine
clean up old F10 system
backup F10 system files via script
backup /home directory via tar to external drive

Installation steps
Install new F12, Developer's edition
Install RPMs via script
Build and install FFmpeg RPM with faac support from nonfree RPM Fusion repo via script
Install favorite programs
Install Cinelerra dependencies
Install Cinelerra

For those with strong constitutions, here's the full project plan:
http://spreadsheets.google.com/ccc?key=0AjSzE_zejuQZdFphck9aQUVBbzZVOWhyOC1CaVFVQmc&hl=en

I'm almost there..most of the planning is done. Now, to execute! I'll let you know how it goes.
The Mule

Reference
http://www.graphics-muse.org/wp/?p=501

Saturday, January 16, 2010

best practices to alleviate audio sync problems in Cinelerra

Audio synchronization problems are the bane of video editors everywhere. Here's what I do in Cinelerra to try to prevent them.

The first thing to understand is that playback in Cinelerra is a separate process from rendering (exporting) your project to a final format. So it is a good idea to calibrate the audio-video synchronization of your files when they are played back in the Cinelerra compositor as well as the a/v sync of rendered output. More specifically:
1) You need to calibrate the audio you see being played back in the compositor. Do this by setting Audio Offset in the Preferences -> Playback -> Audio Out so that your playback audio is in sync with the video. I generally use ALSA as my audio driver under Preferences -> Playback. (You might also want to try to use OSS or ESound to see if those audio drivers help your playback sync issues.) For reference, my offset is .1 seconds.

2) You'll need to calibrate the audio and video once it is rendered out of Cinelerra. This doesn't have to be the absolute final format of the file. Just an intermediate file format to determine that audio is not drifting and in sync. You'll do this by setting Nudge on your audio tracks so that your rendered audio and video are in sync. Here's an article on nudge:
http://crazedmuleproductions.blogspot.com/2007/05/nudge-avidemux2-and-reminder-about.html

Let me give you an example.

My projects usually run about an hour on the timeline. When I start a project, I will concatenate a bunch of clips or raw videos on the timeline. I will then render a short segment of video, about 15 seconds long, from about 45 minutes into the timeline. The segment I take should have key features like someone speaking or someone hitting a drum that I can use to determine audio synchronization. I then render the file to a format that works well in the various Linux media players:
-Quicktime for Linux using MPEG4 video compression and MP4 or twos complement (pcm) audio compression
-Quicktime for Linux container using JPEG video compression and MP4 or twos complement

The side benefit of using MPEG4 video compression is that it renders damn fast.

The good thing about these steps is that if you work with the same format of video over and over, you won't need to change #1, the Audio Offset.

Here are notes regarding specific source formats and output formats.

MPEG SOURCE FILES to MPEG RENDERED OUTPUT
After much study and pain, I've found that when working with MPEG-TS HDV files as my source (and MPEG formats in general), the best pipe to render from Cinelerra in order to alleviate sync headaches is mpeg2enc. I'm not five channel yet, so I just export my 48.1Khz stereo audio as MPEG Layer II audio MP3s @ 384kbps. I then use mplex to combine my audio and video streams into a program stream. Further on, I use VLC to convert that PS into MPEG-TS (HDV) and then use FFMPEG to convert the HDV into DVD and iPod/iPhone compatible formats.

QUICKTIME (QT) SOURCE FILES to QT RENDERED OUTPUT
If my source video format is Quicktime for Linux (like from a screen capture), then I have no sync problems rendering out to QT for Linux.

MPEG SOURCE FILES to QT RENDERED OUTPUT
If I render my MPEG-TS, HDV projects using Quicktime for Linux as an output format (MPEG4 or JPEG video w/twos complement or MP4 audio compression), then I will get sync problems in the rendered output. I then follow the above best practices to alleviate the problem.

TEST YOUR OUTPUT
In Fedora, I've found that the best media players to test final output are mplayer, vlc and ffmpeg.

Finally, there are options to mplex and ffmpeg to offset audio and video sync problems:
mplex -O ; eg, mplex -O 350
ffmpeg -itsoffset ; eg, ffmpeg -itsoffset 0.35

Hope this helps,
the mule

Reference
My Article on Cinelerra's "nudge" parameter
FFMPEG HowTo
http://man-wiki.net/index.php/1:mplex

Saturday, January 09, 2010

automating repetitive tasks by scripting Cinelerra EDL, part I

I produce a bi-monthly video of my band's jam sessions:
http://feeds.feedburner.com/StormpigsPodcast

The format of the video edit is roughly the same for every video:
  • intro titles
  • staff titles
  • songs
  • end credits
Since the Cinelerra EDL (edit decision list) is an XML text file, it occurred to me that I should be able to add the titles by editing this text file.

Cinelerra's Edit Decision List (EDL)
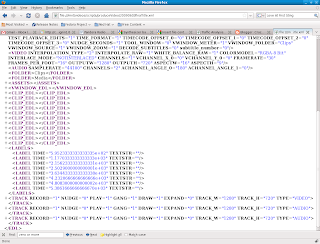
Let's look at Cinelerra's EDL. This is an XML text file that gets written when you save a Cinelerra project. The easiest way to review the EDL is to open it in a browser, as the browser will let you expand and collapse the XML elements. Here's a screen cap of the EDL in Firefox:


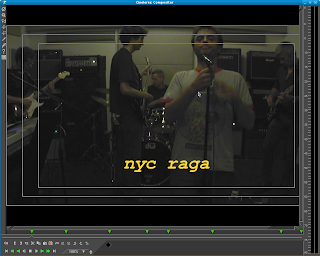
When I create my monthly video podcast, I place title effects on Cinelerra's timeline for each song of about a dozen songs. The title effect looks like this:


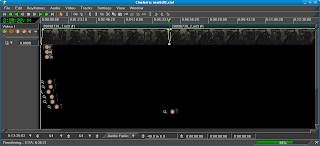
Placing title effects is a real time sink, especially when I have to place one for each song. I place title effects about 20 seconds into each song. I separate each song by placing a label between the clips. So the labels indicate where in the video track I will need to place title effects. You can see that the title effect is placed after the appearance of a label in Cinelerra's timeline below:


The Task
My goal is to have a shell script find the position of the label in the EDL and plop the title effects about 20s after the appearance of the label. After I add the labels programmatically, I can do fancier edits to the project later on.

In today's post, I will describe a bit more about my workflow and the EDL, and also show you a basic shell script command to insert a title effect into the EDL.

The Procedure
First, I put my basic edit together assembling the clips on the timeline, doing my audio and video fades and placing labels between the clips. This is my first round of edits. At this point, my timeline is very simple. I only have a video track and two audio tracks:


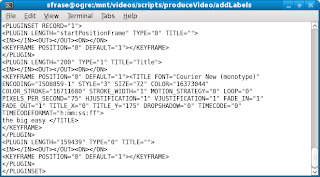
I will use a script to insert a title effect into the EDL file. In the Cinelerra EDL, a title effect (designated by the PLUGINSET XML element) looks like this:


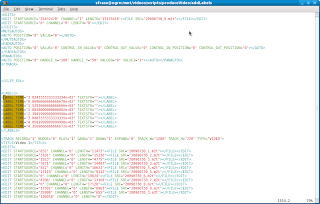
Let's inspect the EDL in order to find the block of labels. If you grep for 'LABEL TIME' in the EDL, you'll find an XML code block that looks like this:


I will need to edit the video TRACK that appears directly beneath the LABELS in the EDL. Since there is quite a bit of confusing repetition in the EDL file, finding the list of LABELs helps identify which TRACK we need to edit. I've capitalized the words in the above sentence to highlight the XML elements you'll need to look for when editing EDL.

Using a bash shell script, I'll add a title effect after the last MASKAUTOS XML tag, but before the closing TRACK tag. Again, this is the closing TRACK tag of the video TRACK:


I've created a second file containing just one title effect, the PLUGINSET example from above:


I will then use a bit of sed (stream editor) magic to insert that file into the right spot in the main Cinelerra EDL for the project. Here is the script command that will place the PLUGINSET into the correct position in the XML:
sed -e "/LABEL TIME/,/^<\/MASKAUTOS/{ /<\/MASKAUTOS>/r titleEffectPluginset.txt
}" cinelerraEdl.xml > cinelerraEdlNewEdit.xml


Let's break this apart:
sed -e "/LABEL TIME/ # This finds the first occurrence of "LABEL TIME" (a label) in the EDL. Remember that the appearance of labels in the EDL tells us that the video TRACK in which we need to insert our title effect comes next in the file.

,/^<\/MASKAUTOS/{ # This finds the first occurrence of a closing MASKAUTOS tag after the string "LABEL TIME". Our title effect, the PLUGINSET, will be inserted after this closing tag.

/<\/MASKAUTOS>/r titleEffectPluginset.txt # Insert the title effect boilerplate after the end MASKAUTOS XML tag

}" cinelerraEdl.xml > cinelerraEdlNewEdit.xml # Have sed perform the edit on "cinelerraEdl.xml", but save the output to "cinelerraEdlNewEdit.xml

The Result - Before


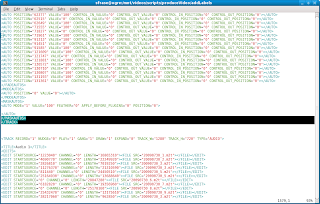
The Result - After


You can see that sed has inserted the title effect (the PLUGINSET XML boilerplate) in between the closing MASKAUTOS tag and the closing tag of the video TRACK. Pretty cool!

This is a simple example of editing Cinelerra EDL, but is the first step to helping me automate otherwise manual tasks in my monthly video podcast creation.

I will try to expand upon this subject in future posts.

-enjoy-
The Mule